Proxmox

Proxmox Installation
Proxmox Virtual Environment (Proxmox VE for short) is a Debian-based virtualization platform. The virtualization is based on QEMU/KVM.
Proxmox "packages" QEMU/KVM in its own web interface, simplifies administration, and also supports Linux containers (LXC). This makes Proxmox beginner-friendly, yet powerful enough for professional use.
This section demonstrates the installation and basic configuration of Proxmox in the free (non-subscription) version using an example.
For clarity, image descriptions and additional information can be expanded.
Note: Some images in this guide are from older versions of Proxmox or Debian. However, the process and click paths are consistent and directly applicable to current versions (such as Proxmox VE 9 and Debian 13).
Requirements
Voraussetzungen
- 64-bit CPU
- CPU and motherboard support Intel VT/AMD-V for virtualization (to be enabled in the BIOS).
- 1 GB RAM (for Proxmox only). Depending on the number of virtual machines to be run, more RAM will be required. Therefore, a minimum of 8 GB, and preferably 16 GB, of RAM is recommended.
Create an ISO image/bootable USB stick
First, you need an ISO image, which can be downloaded from the Proxmox download page .
Proxmox Iso
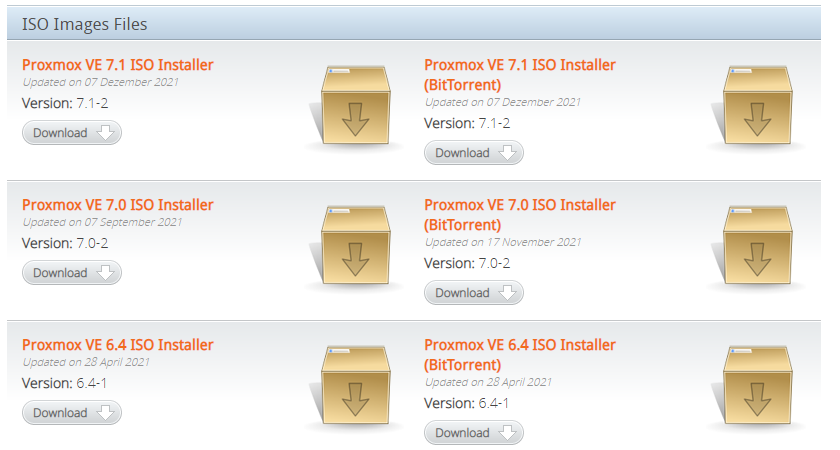
To install, a bootable USB drive is created using this ISO image. This drive should have at least 2 GB of storage. There are several ways to create a bootable USB drive; see below.Installationsmedien vorbereiten .
installation
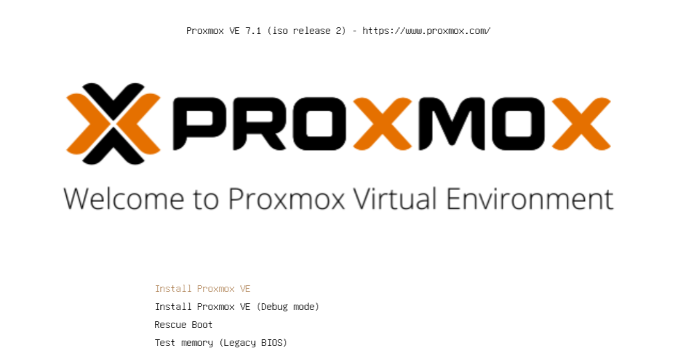
The system is configured in the UEFI/BIOS to boot from a USB device. After inserting the USB stick, the Proxmox installation menu appears after a short time. Alternatively, the USB stick can be manually specified as the boot device (on most motherboards via F8 or F11).
In the installation menu, simply select Install Proxmox VE .
Installations Menü
The next step is to agree to the terms of use (EULA).
Eula

Next, you need to choose the hard drive on which to install Proxmox. If multiple drives are installed on the server, make sure you select the correct one!
Auswahl der Festplatte
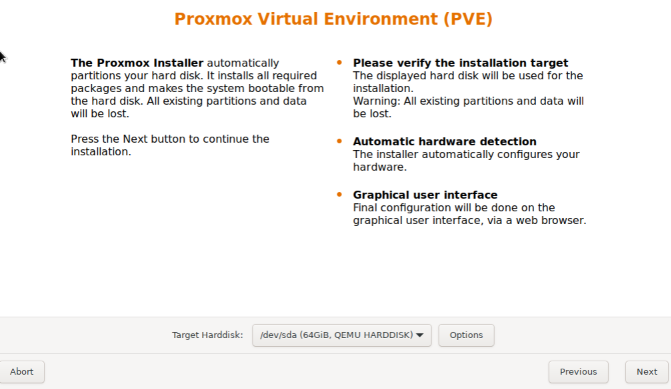
The Options button allows you to specify further parameters for the installation hard drive:
Erweiterte Optionen Festplatte

Proxmox uses the Logical Volume Manager (LVM). The advanced options here allow for detailed configuration of the LVM. The installer creates a Volume Group (VG) named pve and additional Logical Volumes (LVs) named root (where Proxmox itself is installed), data (storage where the virtual disks of the VMs are stored), and swap (where the swap file is located).
Mit den erweiterten Einstellungen können hier gewisse Parameter angegeben werden:
- Filesystem: Here you can choose the filesystem. The default is ext4, which is a good choice in most cases. If multiple hard drives are available on the host system (and plenty of RAM), the ZFS option with the appropriate RAID level makes sense. In this case, however, you should have a basic understanding of ZFS.
- hdsize: Specifies the total hard drive size to be used by Proxmox. Normally, you would select the entire hard drive size here, unless you plan to add more partitions later.
- swapsize: Determines the size of the swap volume. The default is the same size as the installed storage, but with a minimum of 4 GB and a maximum of 8 GB.
- `maxroot`: Specifies the maximum size of the root volume (Proxmox itself). It's worth noting that in the initial installation, any templates and ISO images needed later are also stored here.
- minfree: Storage space left free on the LVM volume group pve. If the hard drive is larger than 128 GB, 16 GB are left free by default (LVM always needs some free space for creating snapshots).
- maxvz: Sets the maximum size of the data volume.
Normally, you can leave all options at their default settings (i.e., nothing is specified here). These are already optimally configured for most installations.
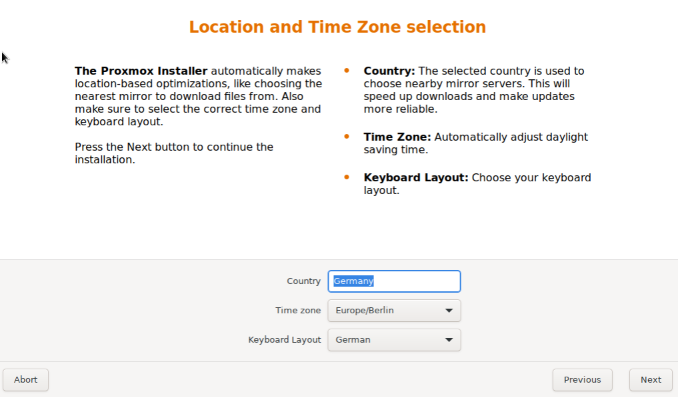
After selecting the hard drive for Proxmox, the localization options are requested (country, time and the corresponding keyboard layout):
Lokalisierung
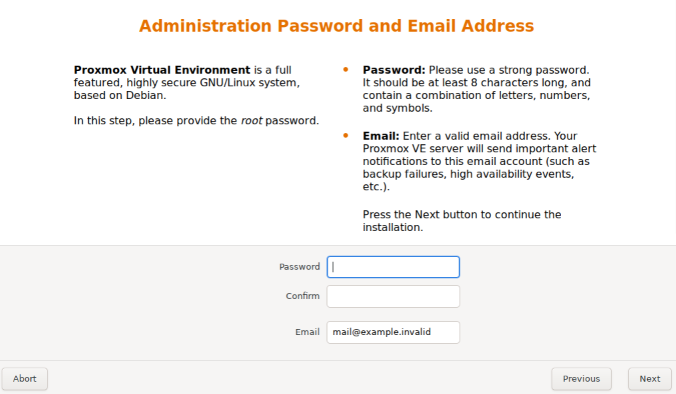
Next, you will be asked to enter the root user's password. You will also be asked for an email address to send important system messages. A valid email address is not required (however, you will then not receive email notifications of system events).
Passwort und Email
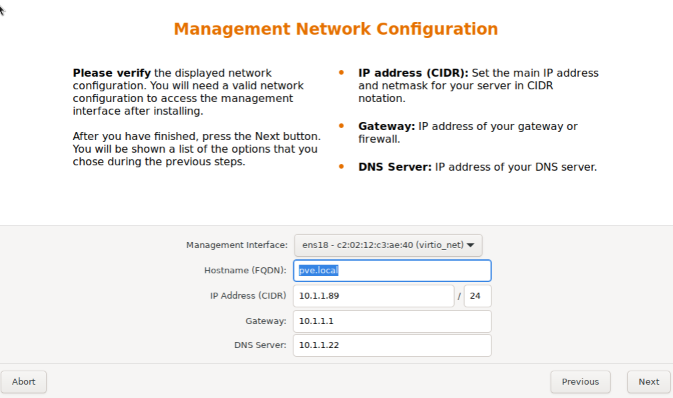
The next step of the installer deals with the network settings. The respective interface can be selected. The hostname is freely selectable, but requires the DNS domain to be specified. For example, for Fritz!Box users, it would be...hostname.fritz.box For the IP address, a static IP address should preferably be specified (not DHCP). This includes the IP address itself (as CIDR notation), the gateway IP (usually the router's IP address), and the DNS server to be used (in a home environment, usually also the router's IP address). Proxmox usually detects the network automatically.
Netzwerk
Finally, a summary of the installation is displayed:
Zusammenfassung
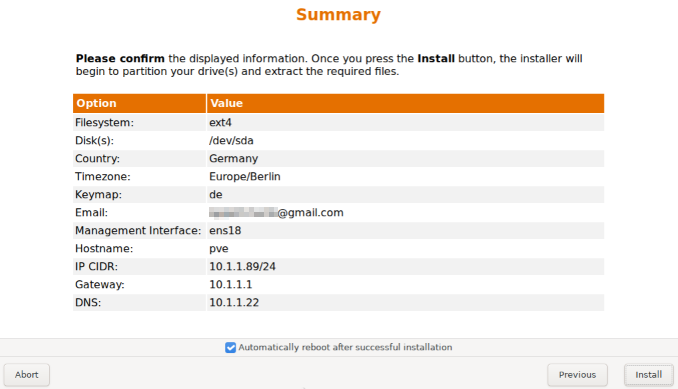
The system will be installed by checking the settings and clicking on Install.
Installation
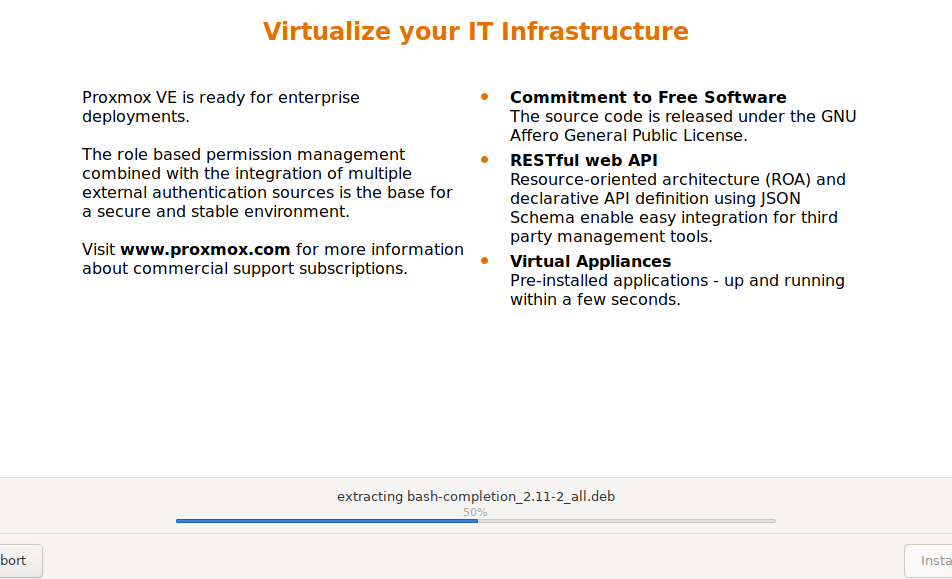
After a short wait, the installation is complete and the system is restarted (remove the USB stick containing the ISO image beforehand).
Next, you'll see the terminal. Here, instructions are displayed on how to access the system:
Konsole
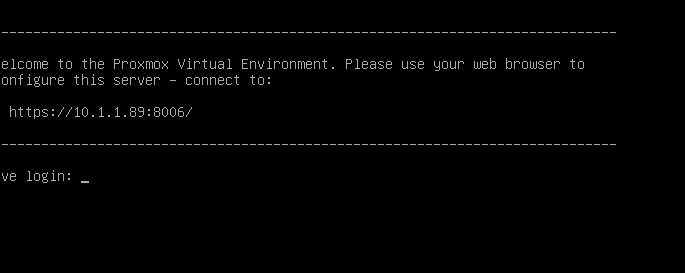
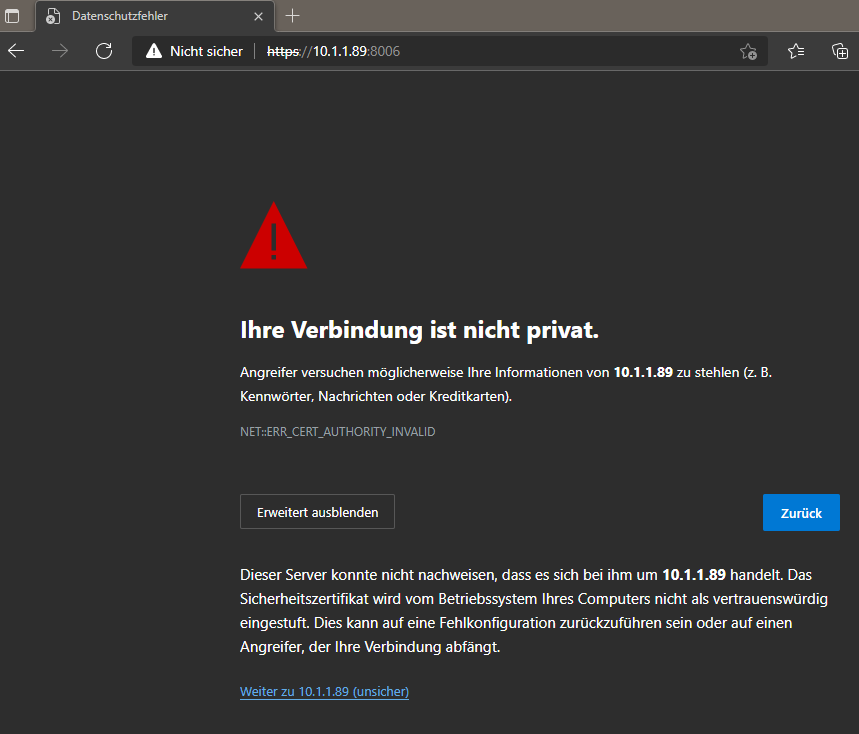
Now, proceed in your browser (for example, https://10.1.1.89:8006 ). First, a warning message will appear. This is because a self-signed certificate was generated during installation, which the browser doesn't recognize. You can safely ignore this message at this point; the connection is definitely encrypted via HTTPS. The message itself varies depending on the browser. In this example, click on "Advanced" and then on "Continue to 10.1.1.89 (unsafe)."
Datenschutzfehler
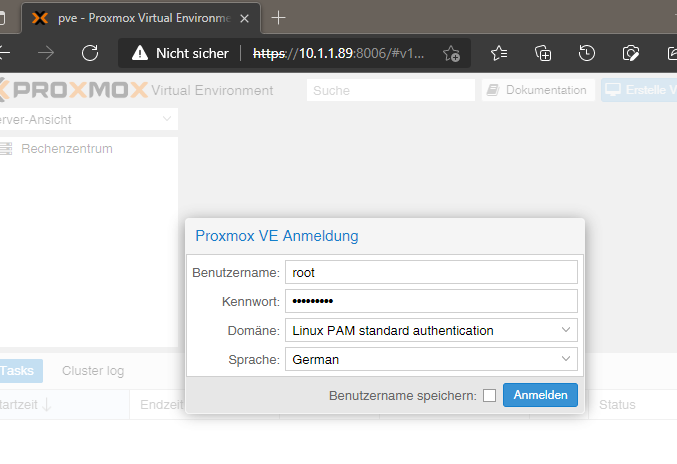
Login is performed using the root user and the password chosen during installation. The language can first be changed to German, eliminating the need to re-enter the username and password.
Anmeldung
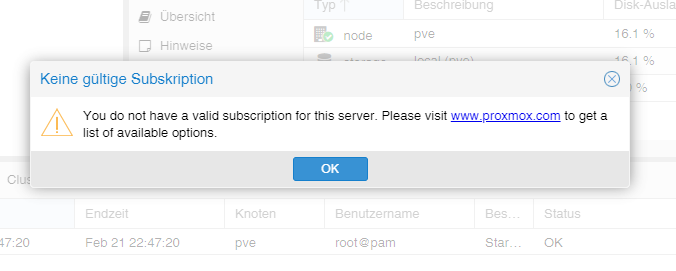
Immediately after logging in, you will be greeted with a message stating that you do not have a valid subscription for this server. This message should be acknowledged by clicking OK.
Subscription
The Proxmox package sources are now being adjusted to receive updates.
Paketquellen
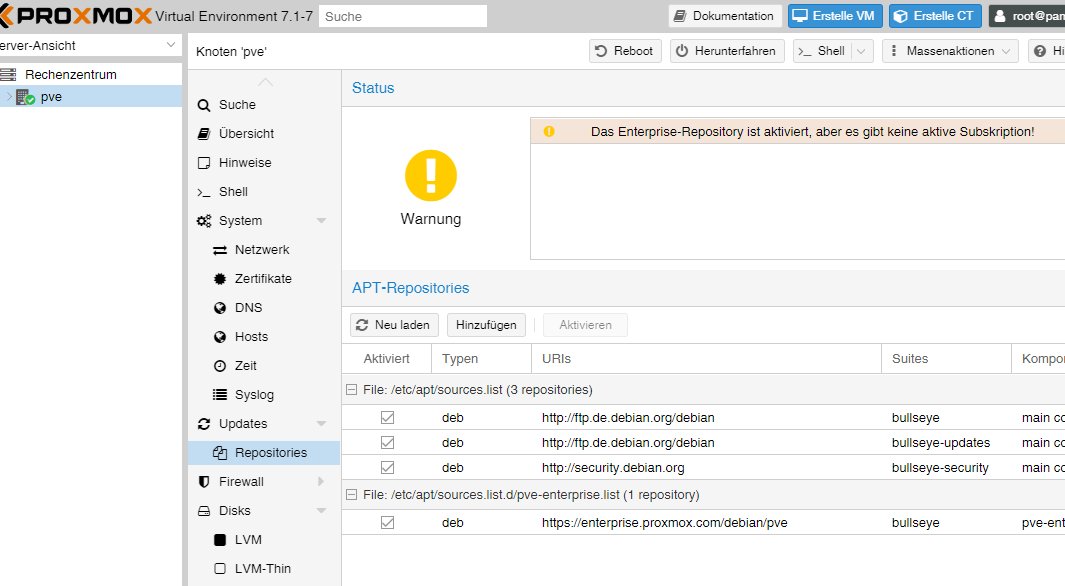
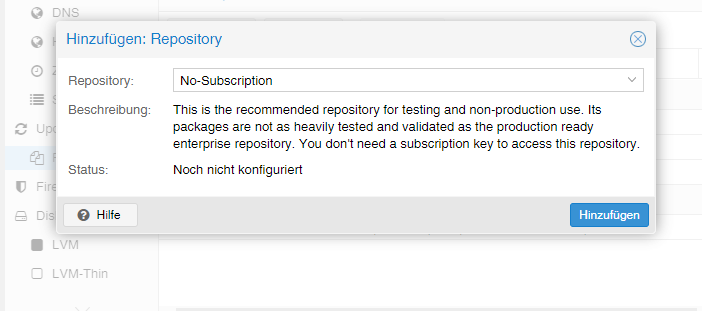
To do this, the non-subscription repository is added to the package sources. This can be done in the Proxmox instance menu underUpdates > Repositories This will be done. The non-subscription repository can be added using the Add button:
Non-Subscription
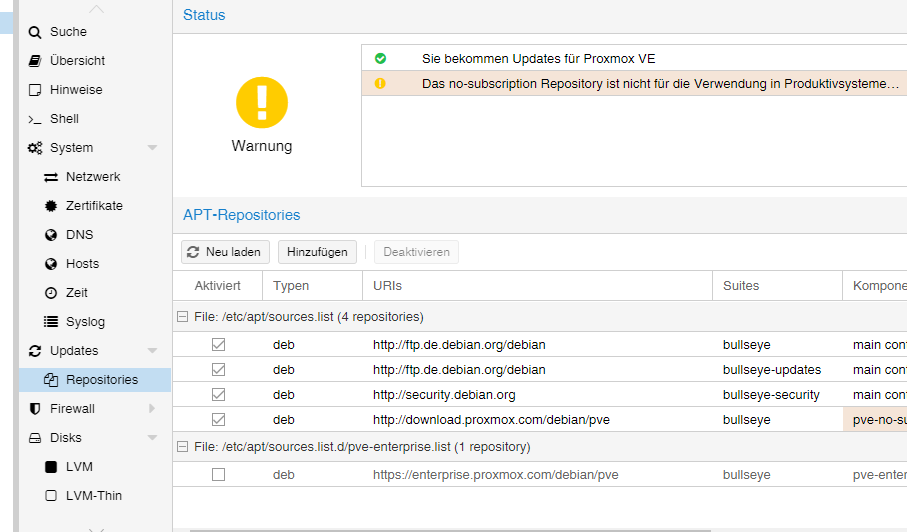
Now the enterprise repository should be deactivated. To do this, simply select the pve-enterprise repository in the repository view and click the Deactivate button.
The repository configuration then looks like this:
Enterprise-Repository
Updates
After the package sources have been changed, an initial system update should be performed. The best way to do this is via the web interface:
Updates
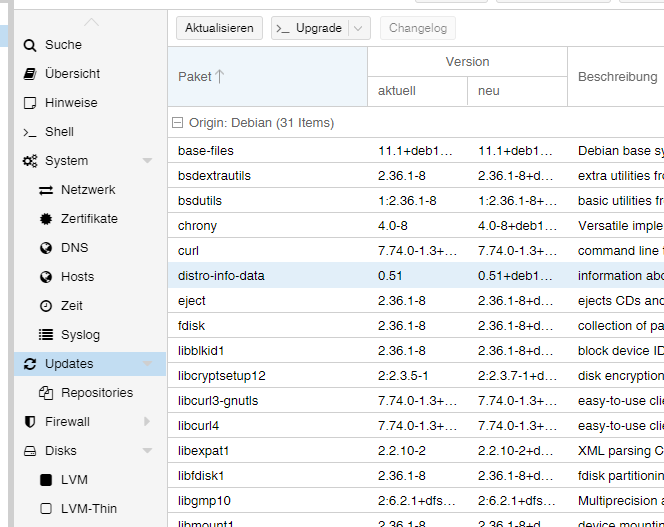
Simply select the desired Proxmox node (e.g., "pve") and then click " Update " under "Updates." This will open the Task Viewer, which appears when system activity is detected. You can close this dialog immediately, as the task continues to run in the background. Waiting for completion ("TASK OK") is not necessary. If updates are available, you can install them by clicking " Upgrade ."
The web console will then open, allowing you to monitor the progress.
Web-Konsole
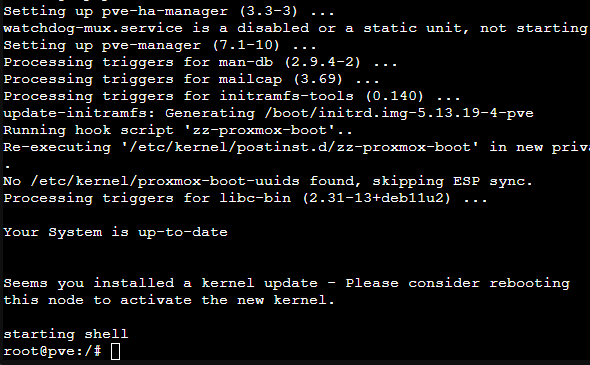
It is of course also possible to update the Proxmox server via the command line (e.g. via SSH):
apt-get update && apt-get dist-upgrade
or, more recently:
apt update && apt full-upgrade
The only important thing here is to use ` apt-get dist-upgrade` or `apt full-upgrade` (on "normal" Debian/Ubuntu machines, you would typically use `apt upgrade`). However, the `dist-upgrade` or `full-upgrade` is crucial for Proxmox because it better resolves dependencies required for Proxmox to function.
Therefore, Proxmox is now complete in its basic configuration. If you would like to delve deeper into Proxmox, it's worth taking a look at the Proxmox Wiki or the official forum .
Proxmox - Creating a virtual Qemu/KVM machine (VM) + subsequent ioBroker installation
This guide shows how toVM (Debian stable, as of 2026 = Debian 13 'Trixie') is created and then ioBroker is installed in it.
As an alternative to Debian, Ubuntu can be used, but care should be taken to use an LTS version .
For better clarity, image descriptions and additional information are included in expandable sections.
1 - Download ISO image
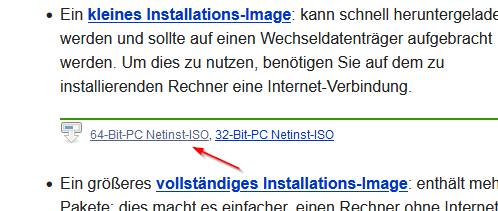
First, an ISO image is created (64-Bit-PC Netinst-ISO ) is required, which is loaded into the root directory (local) in the basic installation.
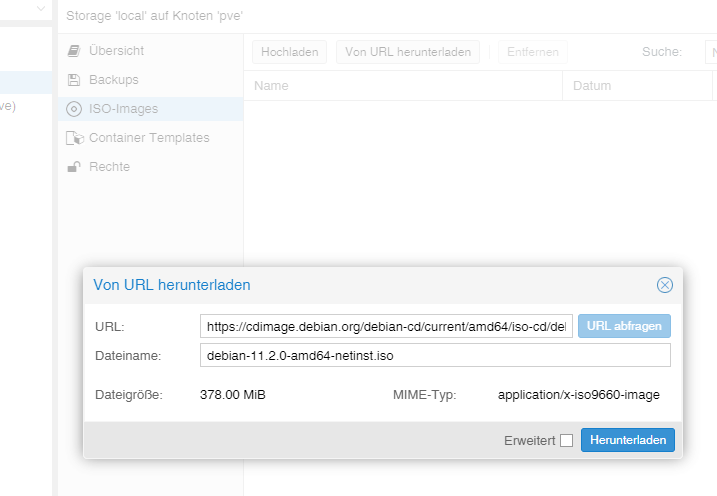
To do this, go to the local > ISO-Images section. There are two options:
- The Upload button allows you to upload the ISO file, which was previously stored on the computer, to the Proxmox host.
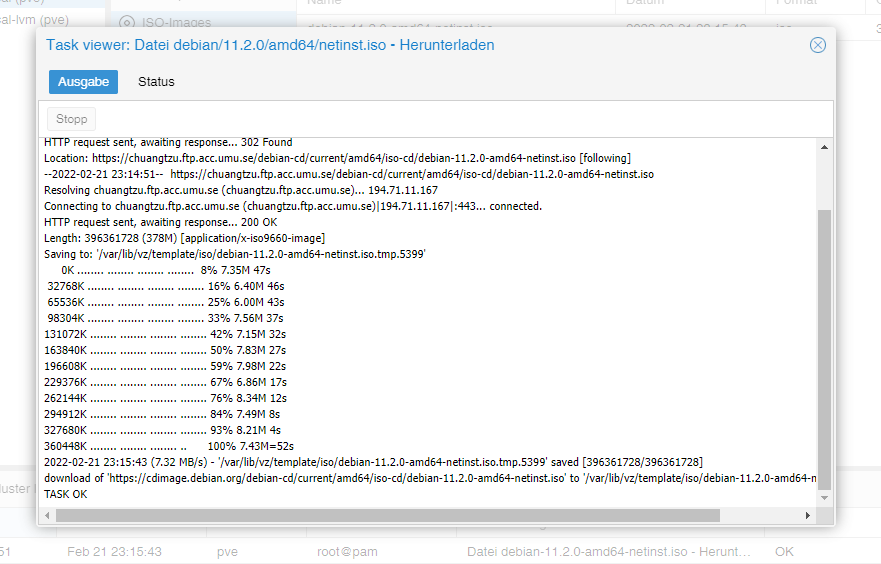
- Using the "Download from URL" option, the ISO can be downloaded directly to the host via a URL. To do this, copy the link address of the 64-bit PC Netinst ISO (right-click), paste the URL, and retrieve it by clicking " Get URL ." A final click on "Download" starts the download directly to the host.
ISO herunterladen
2 - Create a VM
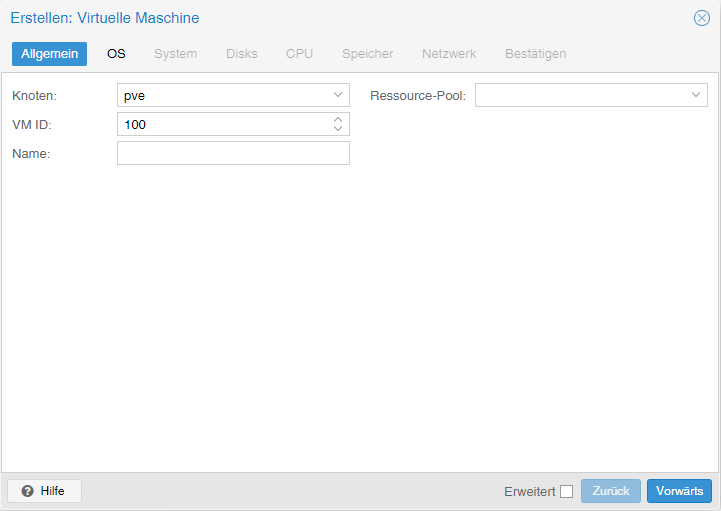
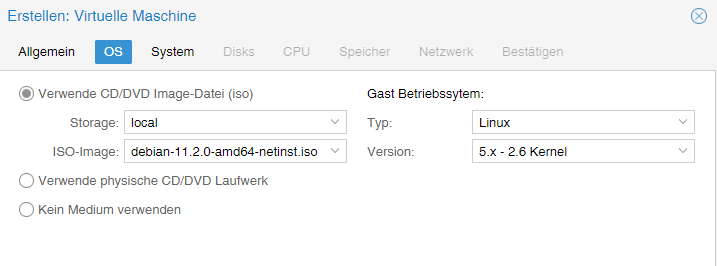
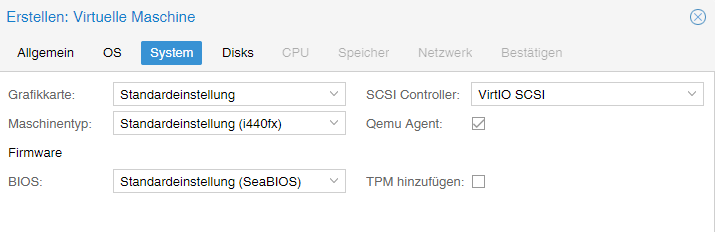
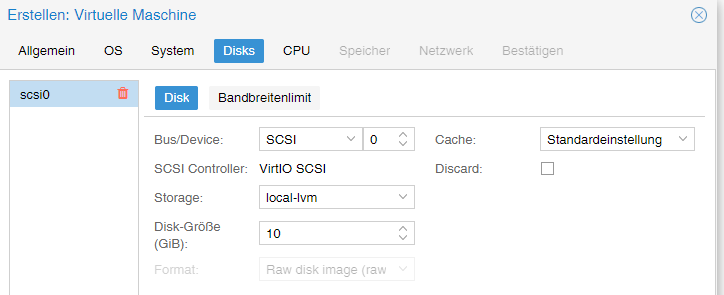
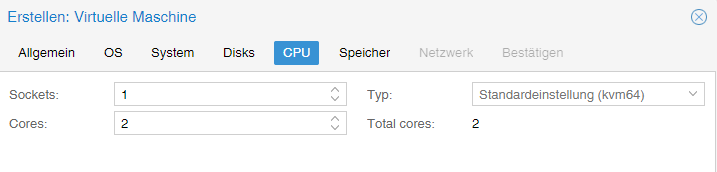
Clicking the blue "Create VM" button opens a window with the following settings:
- General: Hostname and password are assigned, ID is predefined (starts with 100), can be changed, but not afterwards.
- OS: Storage selection (local) and ISO image (debian-13-netinst.iso)
- System: everything remains in the default settings, check the Qemu Agent box.
- Disks: Storage local-lvm, disk size 10GB (10-20GB should be sufficient, subsequent changes are possible, but are not described further here).
- CPU: Depends on the computer's performance (can also be adjusted at any time, the VM must be restarted for this)
- Memory: RAM size in MiB (can also be adjusted at any time, the VM must be restarted for this)
- Network: vmbr0, everything else remains as specified
- Confirm: Here you will see a summary again, (check the box for "Start after creation ") then the VM will be created by clicking " Finish" .
Bilderserie Erstelle VM
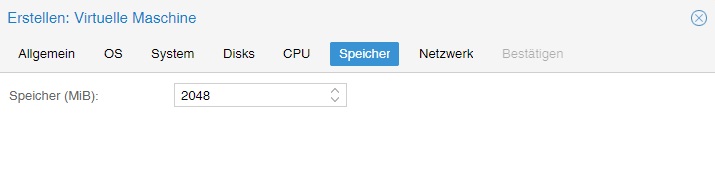
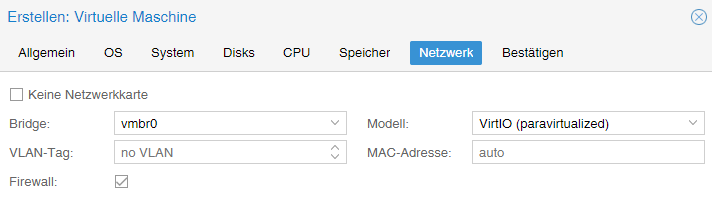
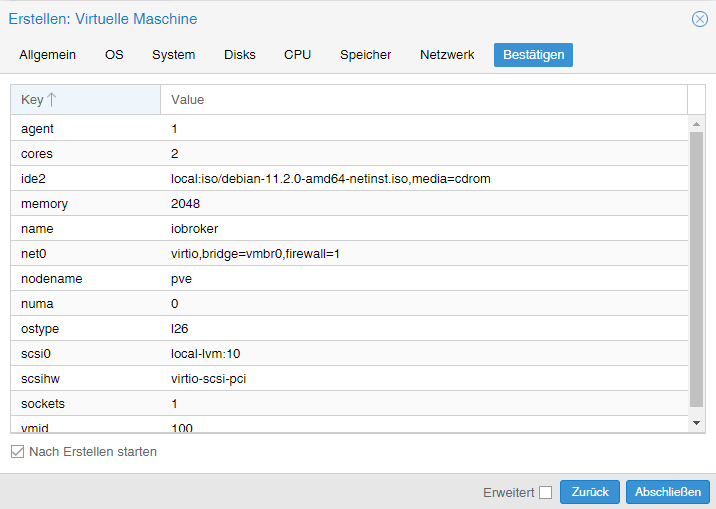
3 - Debian Install
After the VM has started, go to the VM console and start the installation .
Konsole
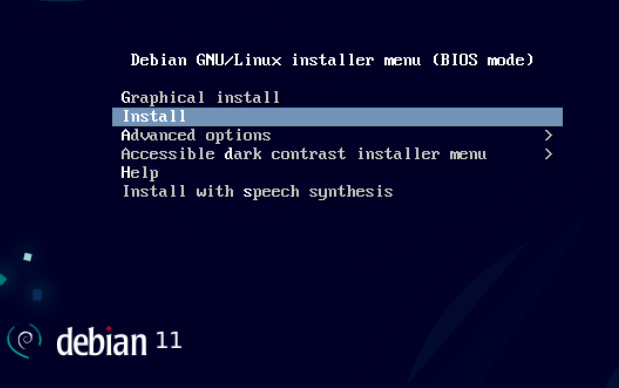
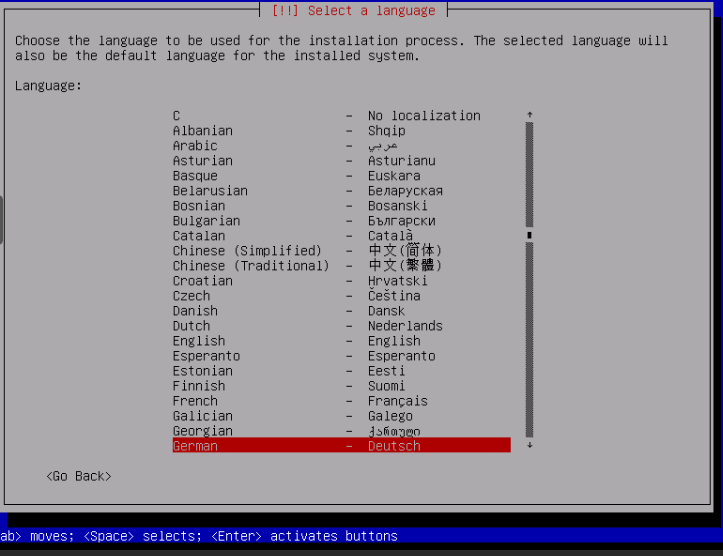
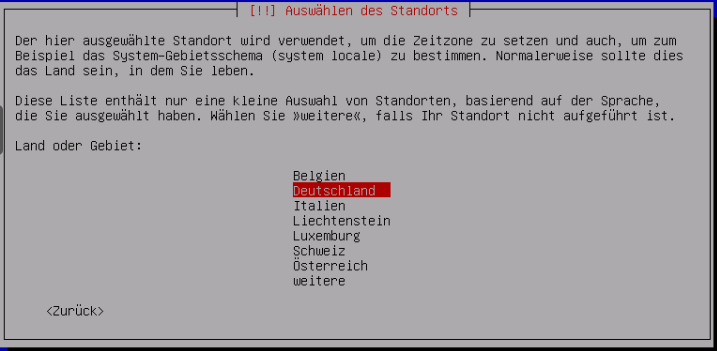
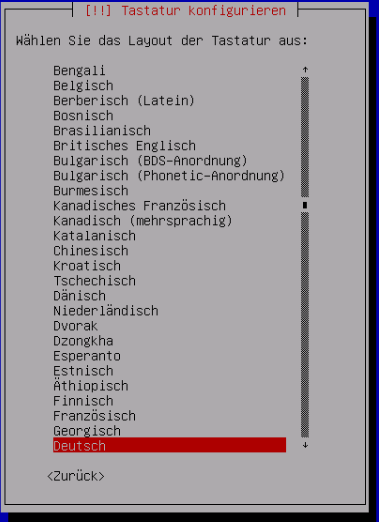
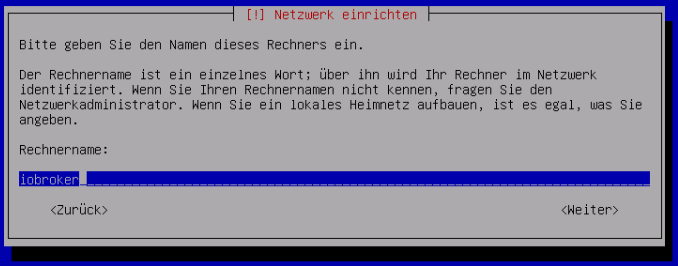
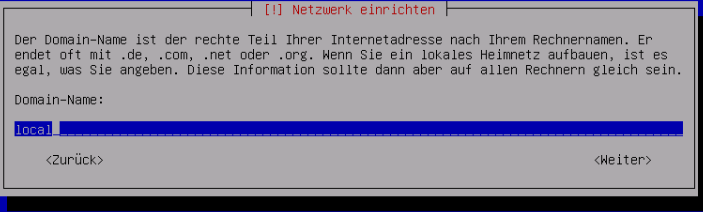
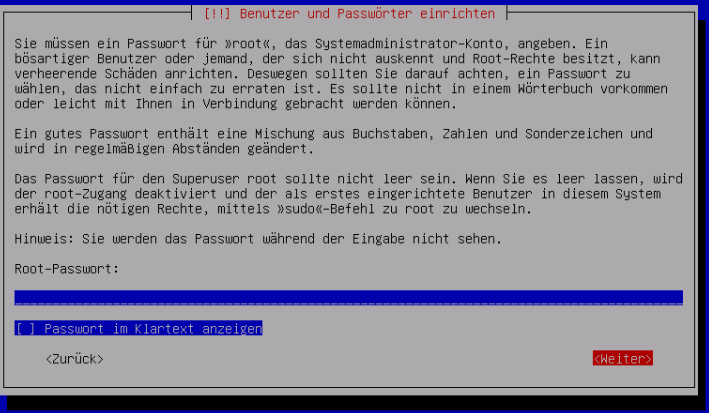
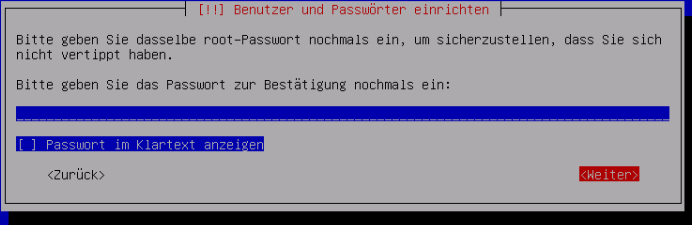
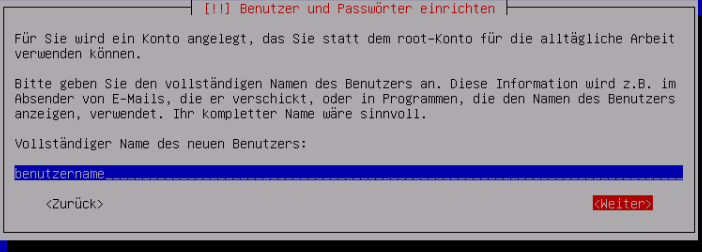
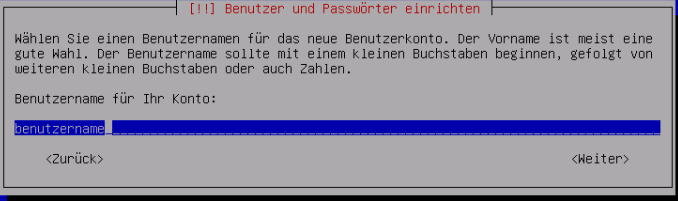
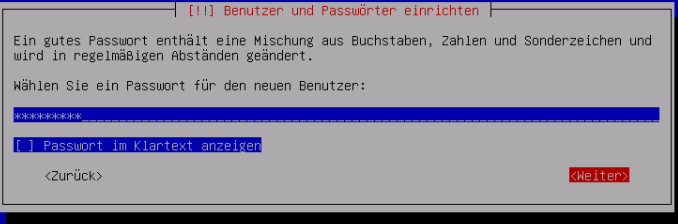
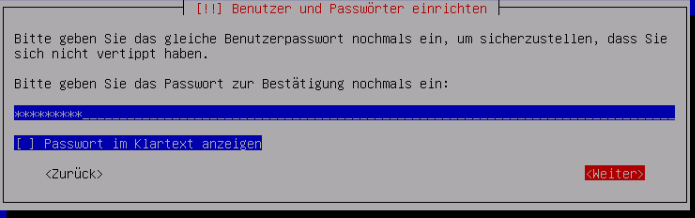
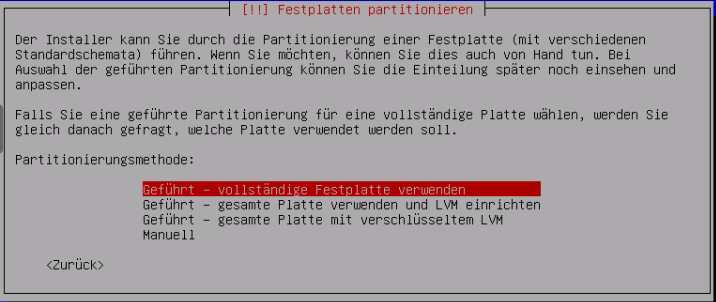
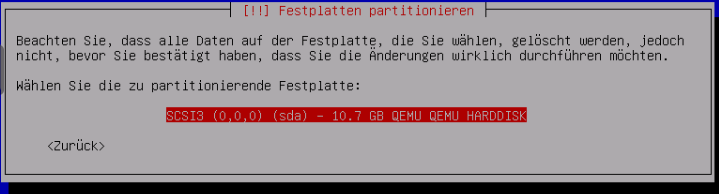
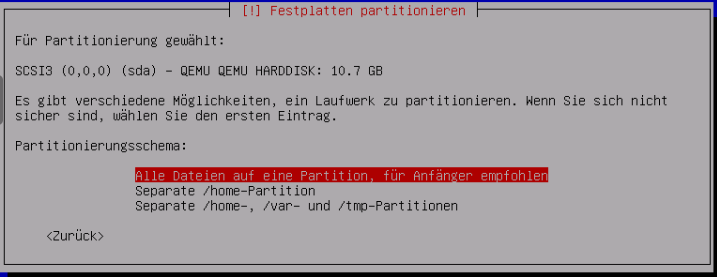
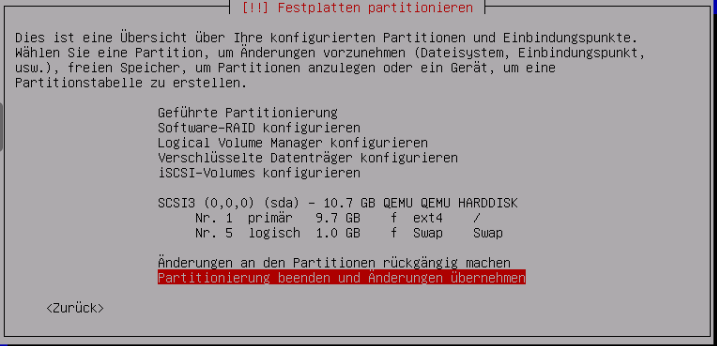
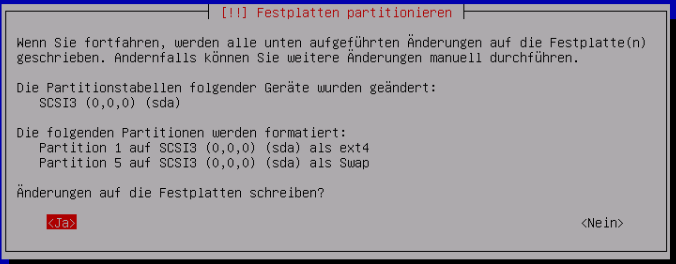
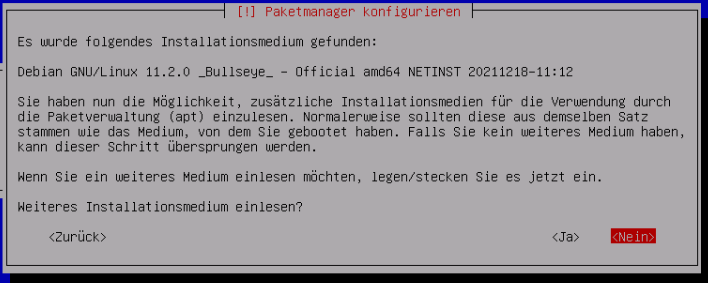
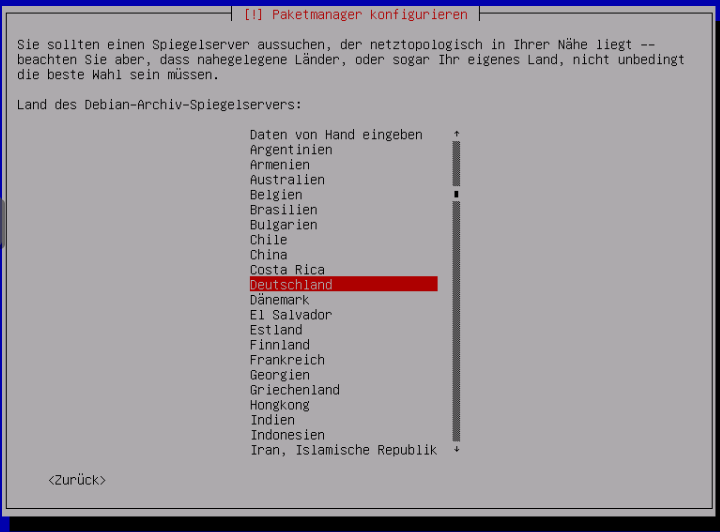
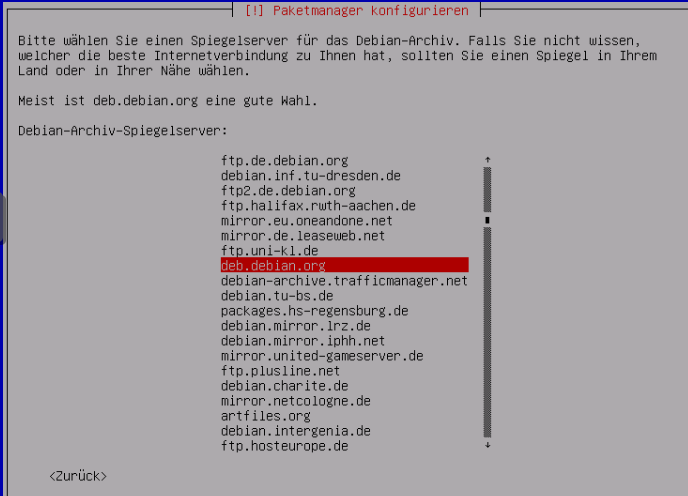
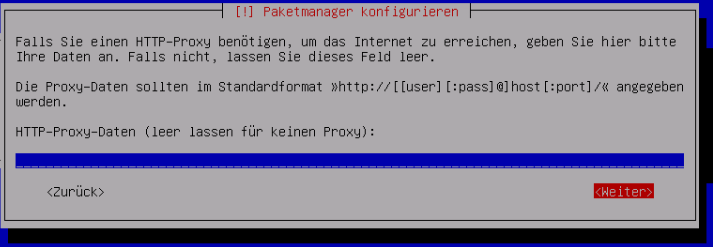
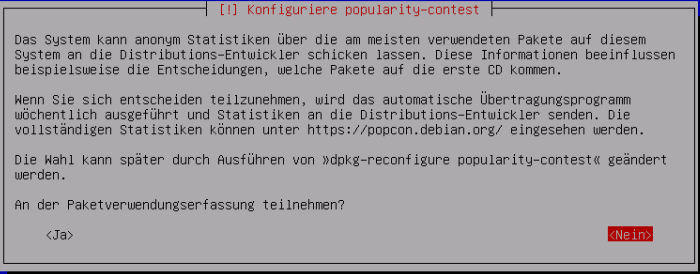
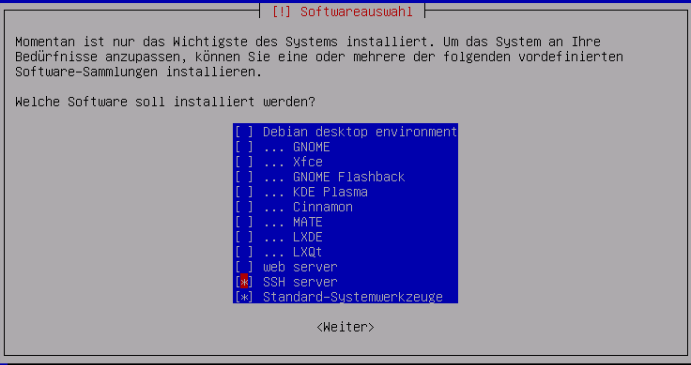
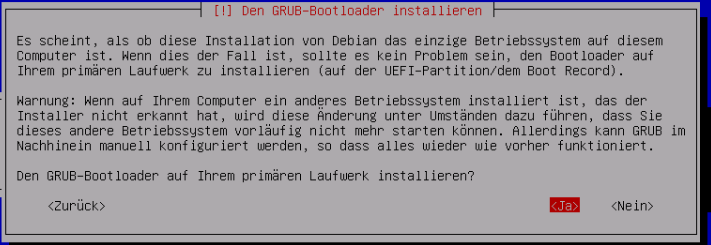
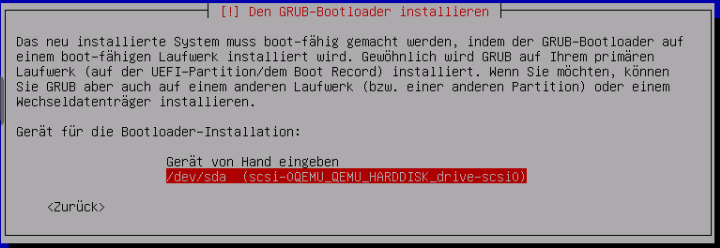
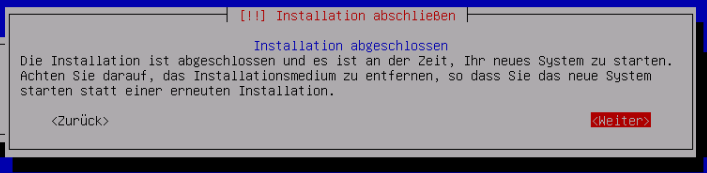
The installation process will guide you through the process, requiring you to configure several settings. You will need the Tab, Space, and Arrow keys to navigate. Due to the complexity of the program, various settings are illustrated in the accompanying image series.
WARNING! - A root password must not be set.
ATTENTION! - ioBroker must not be chosen as the username, as it is already used internally by the system.
The username should consist only of lowercase letters and the numbers 0-9, and should begin with a letter. A hyphen is also permitted, but not as the first character.
Bilderserie Debian Install

4 - Setting up a VM
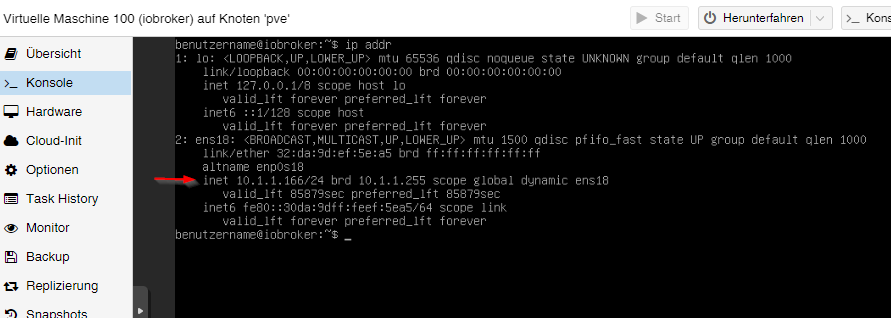
Restart the VM, then log in with the username and password assigned during installation. Then, use the command...
ip addr
The IP address has been located. This is needed to connect to the VM remotely via SSH, as in the next step.
ip addr
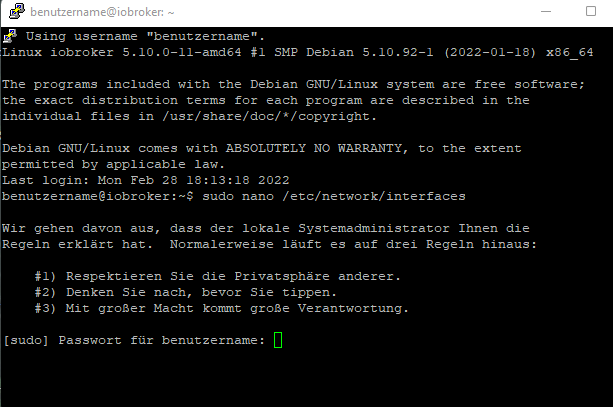
Now you can access the VM via SSH (e.g., PuTTY). Log in again with your username and password. Then you can change the network address from DHCP to static (which is recommended for server operation).
sudo nano /etc/network/interfaces
network/interfaces
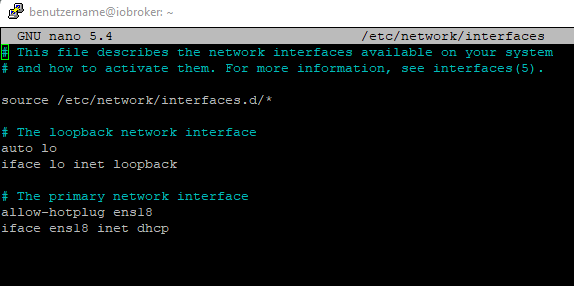
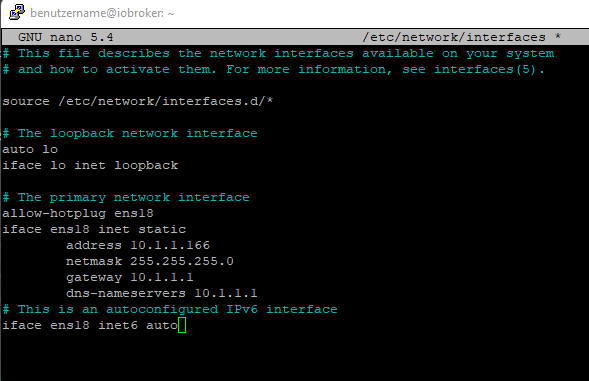
Changes in the editor are saved using the key combination CTRL + o, followed by ENTER; CTRL + x exits the editor.
Changes to the IP address will only take effect after a VM restart. Before that, however, a check is performed to see if the Qemu guest agent is active, using...
sudo systemctl status qemu-guest-agent
Guest-Agent
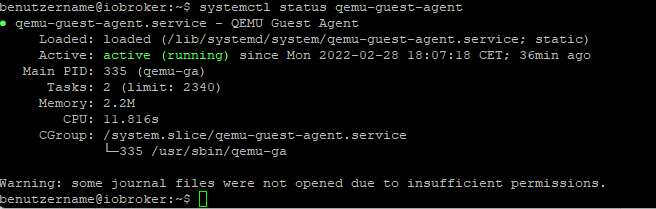
ATTENTION! - On Ubuntu installations, the Qemu Guest Agent must be installed and started.
Commands for this:
sudo apt-get install qemu-guest-agent
sudo systemctl start qemu-guest-agent
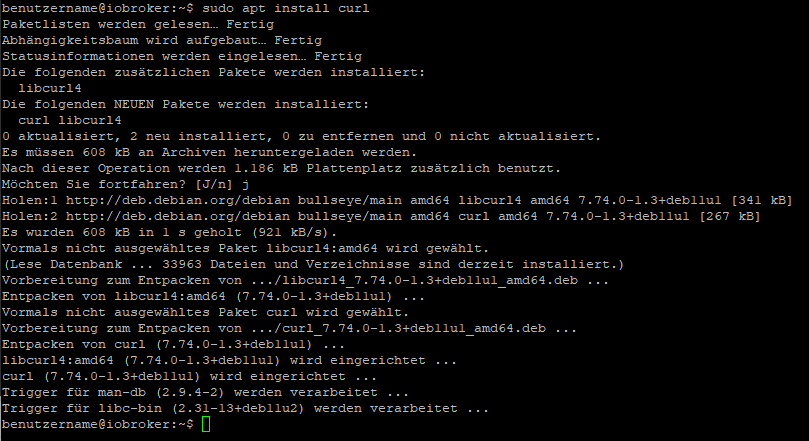
Furthermore, the curl tool must be installed separately for the installation of ioBroker.
sudo apt install curl
curl nachinstallieren
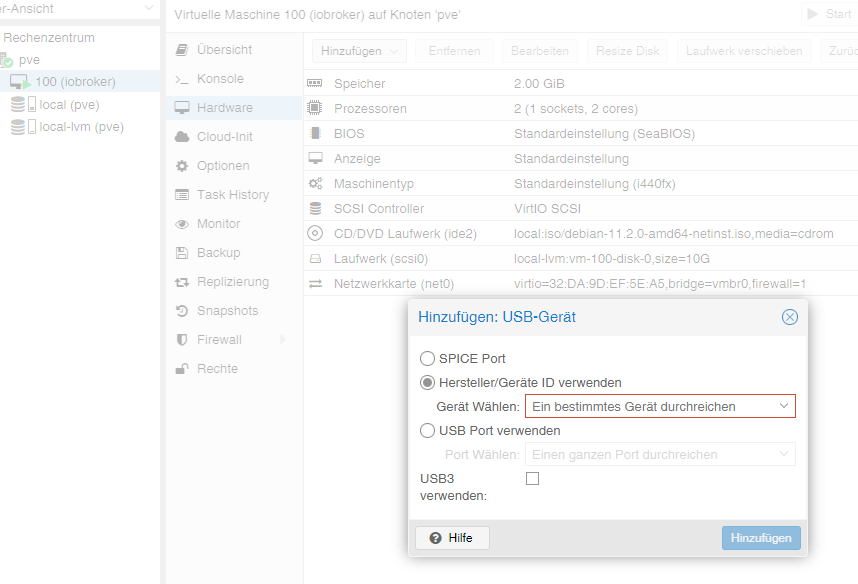
To pass through USB devices in a VM, select the VM > Hardware > Add > USB Devices > Manufacturer/Device ID. All connected devices will be listed here.
USB-Geräte
To ensure the VM starts automatically after a restart of the Proxmox host, this function is enabled in the VM's options.
Option booten
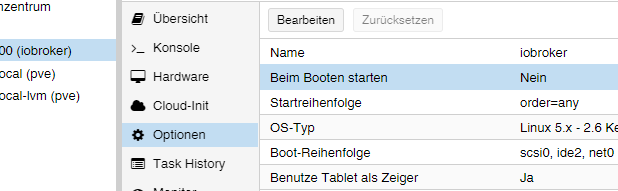
The installation and setup of the VM is now complete. The VM can now be restarted and ioBroker installed afterwards.
Proxmox - Creating a Linux container (LXC) + subsequent ioBroker installation
This example guide shows how to create aLXC Container (Debian 13) is created and then ioBroker is installed in it.
For clarity, image descriptions and additional information can be expanded.
Alternative: Automatic installation via helper scripts
Popular helper scripts exist for Proxmox. These were originally created by tteck and, after his death, are maintained by the community under [link to script].helper-scripts.com They are actively maintained. They make it possible to set up an ioBroker container fully automatically with a single command.
[!WARNING] IMPORTANT SECURITY NOTICE: Blindly copying and running scripts from the internet directly in the Proxmox console (e.g., via...) is extremely dangerous.
curl | bashThis poses a significant security risk!Before executing a script, you should always carefully read and understand its source code to know what it will do to the system. If you don't understand the syntax or don't trust the project, you should refrain from this method and opt for manual installation to avoid compromising the integrity and security of your Proxmox server.
Those who are aware of the risks and have reviewed the scripts can find the commands and documentation directly athelper-scripts.com .
1 - Download Container Template
First, a template is needed, which is loaded into the root directory (local) in the basic installation (provided no further drives have been created).
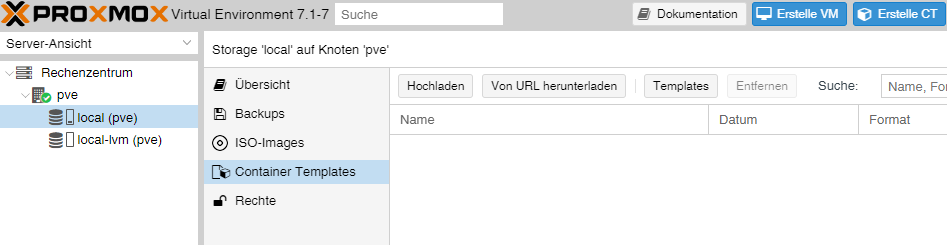
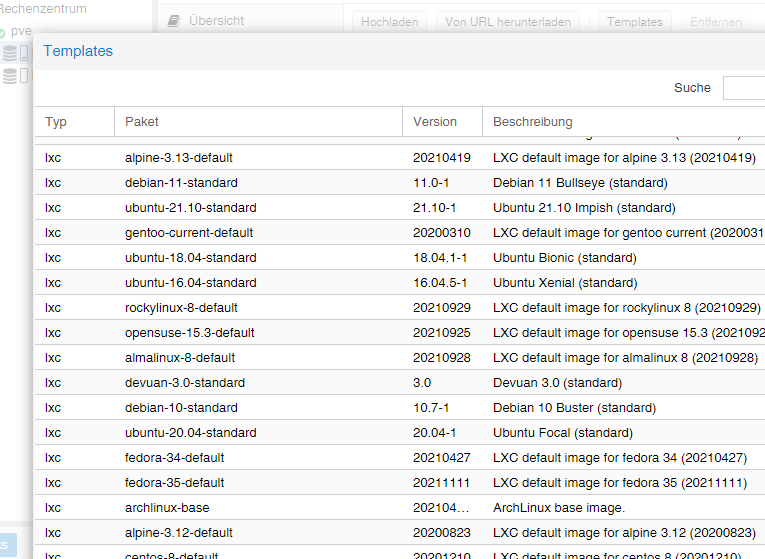
To do this, go to local > Container Templates. Clicking on Templates opens a selection list. Here you selectdebian-13-standard (Trixie) and click on download.
Template herunterladen
2 - Create LXC
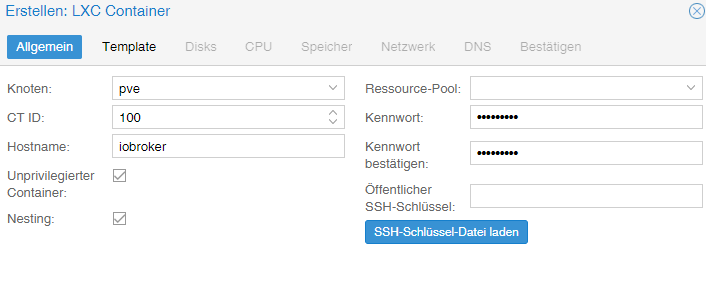
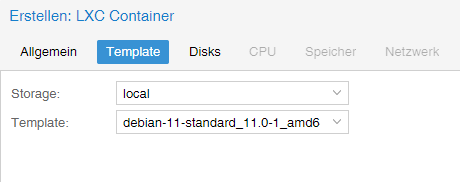
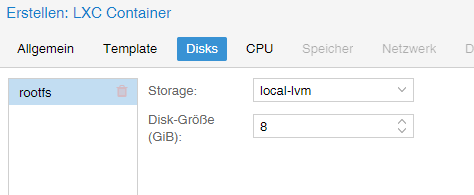
Clicking the blue " Create CT" button opens a window for the following settings:
- General: Hostname and password are assigned; the ID is predefined (starts with 100) but can be changed.
- Template: Storage Selection (local) and Template (debian-13-standard)
- Disks: Assigning disk size (don't be too generous, you can always increase the size later)
- CPU: Depends on the computer's performance (can also be adjusted at any time)
- Memory: RAM/Swap allocation (can be adjusted at any time, even during operation)
- Network: static IP/CIDR assignment, gateway; if no IPv6 is configured, this will be set to SLAAC.
- DNS: usually nothing is changed (values from the host are used)
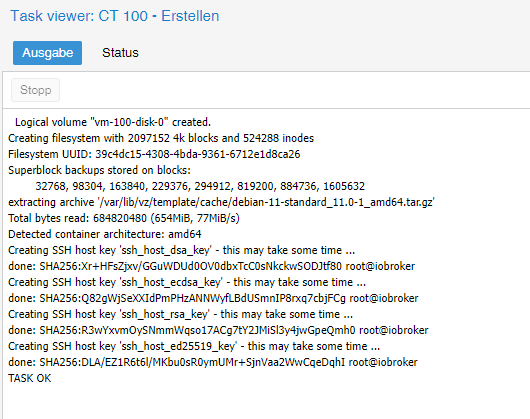
- Confirm: Summary, (check " Start after creation ") then the container is created with a click on "Finish" .
Bilderserie Erstelle CT
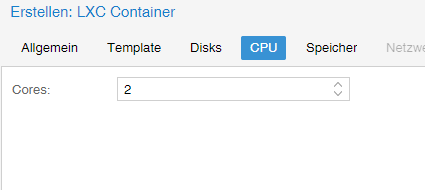

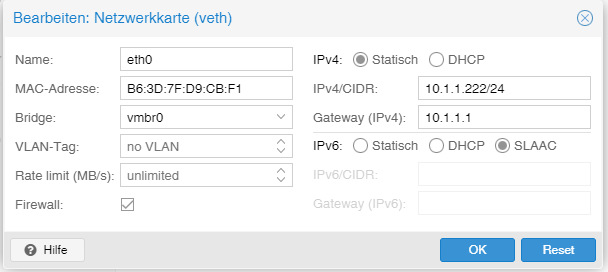
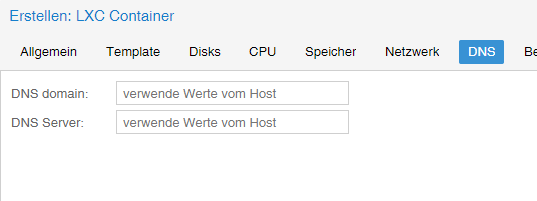
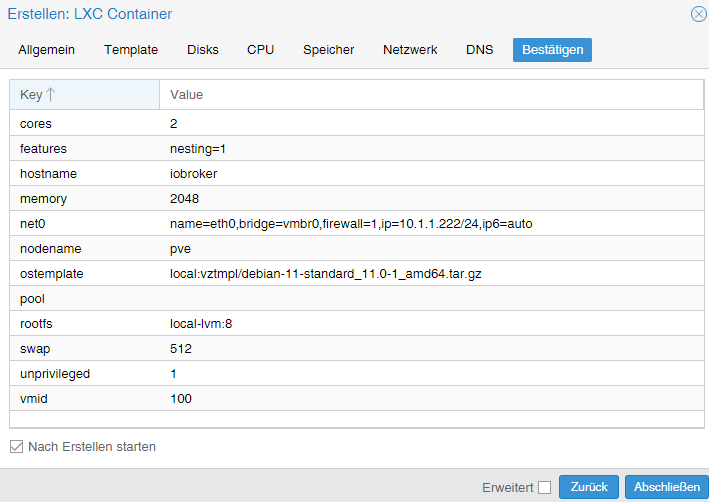
3 - Setting up LXC
Now that the container has started, go to the LXC console.
Konsole
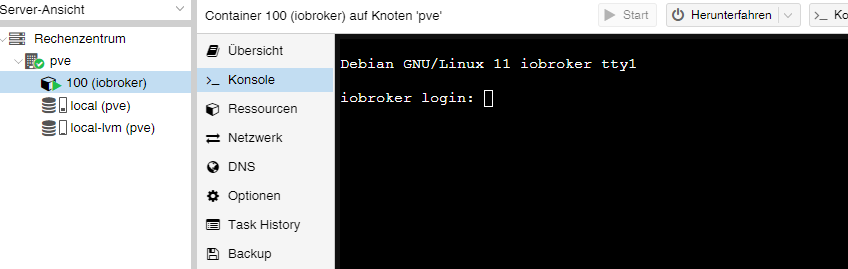
First, you log in as root using the previously assigned password, which was given when creating the LXC file, and then update it to the latest version.
apt update && apt upgrade
Upgrade
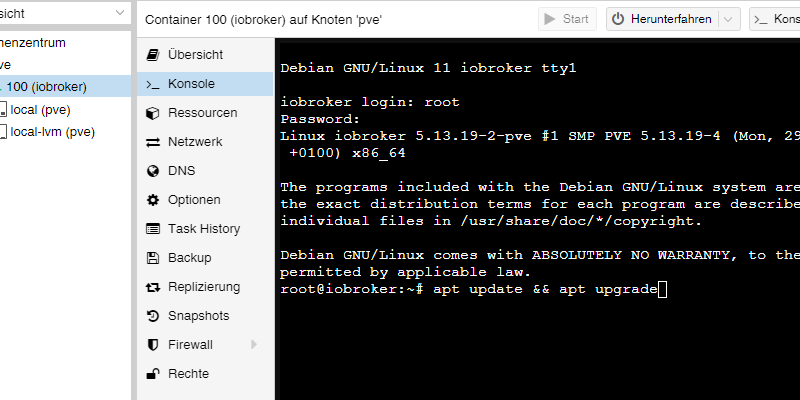
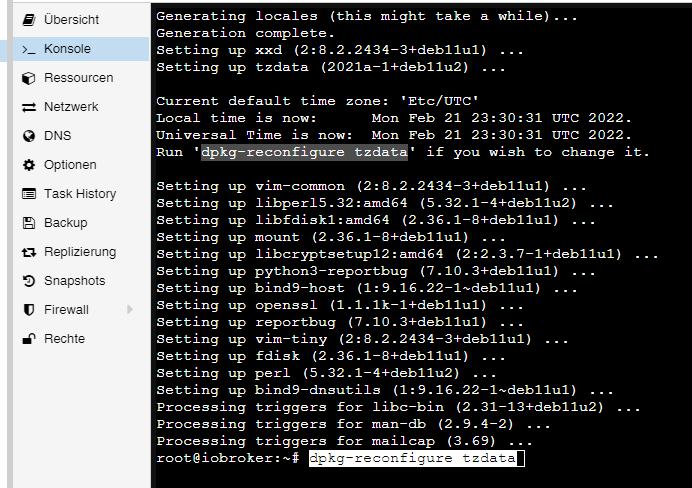
The text then directly prompts the user to set the time zone.
dpkg-reconfigure tzdata
Zeitzone
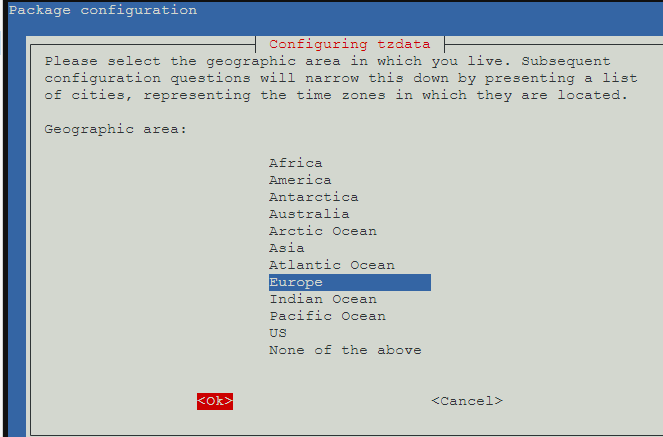
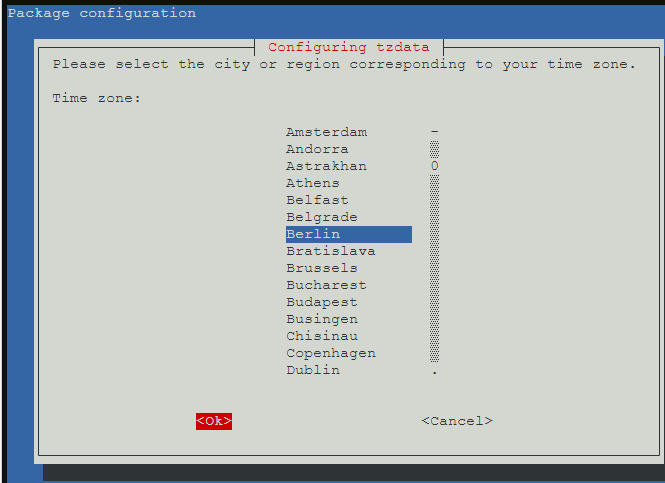
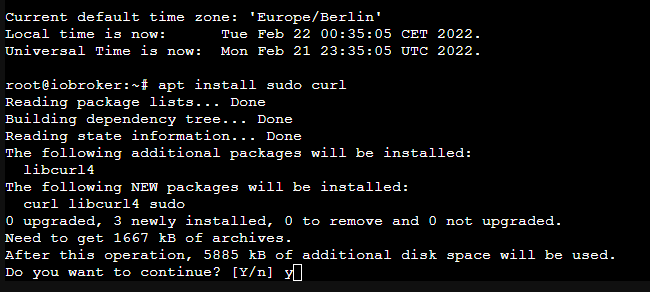
Now, sudo and curl will be installed. Sudo is needed to correctly create a user, as described in the next step, which will be used for future console access. Curl is required to run the ioBroker installation script in the final step.
apt install sudo curl
Nachinstallieren
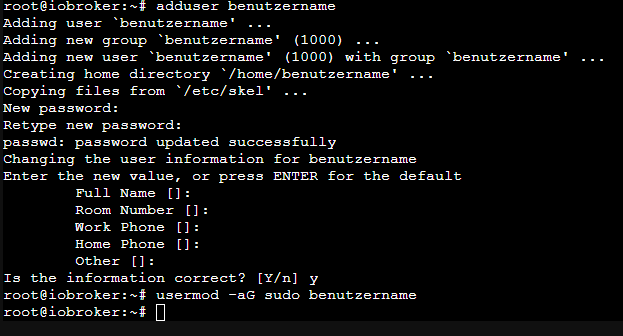
Now create the future user. Replace "username" in this case. Set a password for the user. The rest can be confirmed with ENTER.
A notice:
Do not choose iobroker as the username, as it is already used internally by the system.
adduser benutzername
The user is then assigned to the sudo group.
usermod -aG sudo benutzername
If a user is created subsequently, the assignment to the relevant groups is done via:
usermod -aG adm,dialout,sudo,audio,video,plugdev,users,iobroker benutzername
User anlegen
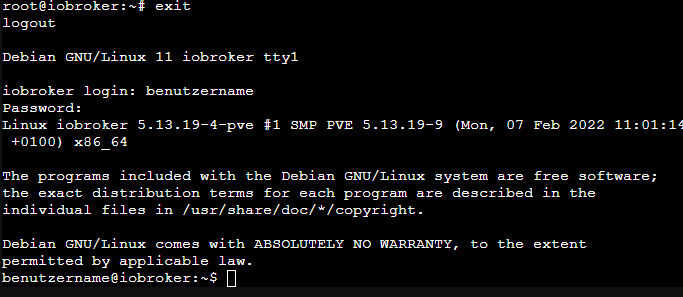
As a final step before installing ioBroker, log out once.
exit
and then log in with the new user. Afterwards, ioBroker can now be installed.
ausloggen und mit Benutzer anmelden
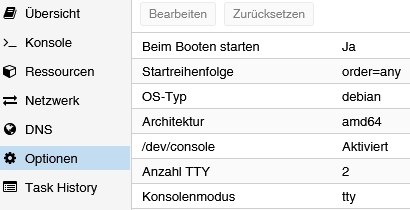
To ensure that LXC starts automatically after a restart of the Proxmox host, this function is enabled in the container's options.
Option booten
Optional: Resolve warnings/error messages regarding services that have not started.
When calling `iob diag`, the output may contain error messages such as those shown below. Some of these errors only occur with non-privileged containers, while others also occur with privileged containers.
....
*** FAILED SERVICES ***

  UNIT                                 LOAD   ACTIVE SUB    DESCRIPTION
* run-rpc_pipefs.mount                 loaded failed failed RPC Pipe File System
* sys-kernel-config.mount              loaded failed failed Kernel Configuration File System
* systemd-networkd-wait-online.service loaded failed failed Wait for Network to be Configured
...
If you want to clean up the container before installing iobroker, you can get the "FAILED SERVICES" as follows:
systemctl list-units --failed
Here is a collection of troubleshooting steps:
failed service run-rpc_pipefs.mount
sudo systemctl mask run-rpc_pipefs.mount
sudo systemctl mask var-lib-nfs-rpc_pipefs.mount
failed service sys-kernel-config.mount
To the container configuration file in the directory/etc/pve/lxc Append the following line:
lxc.cap.drop: "sys_rawio audit_read"
failed service systemd-networkd-wait-online.service
Replacing theifupdown Service byifupdown2 :
sudo systemctl disable --now systemd-networkd-wait-online.service
sudo systemctl disable --now systemd-networkd.service
sudo systemctl disable --now ifupdown-wait-online
sudo apt-get update
sudo apt-get upgrade
sudo apt-get install ifupdown2
Install ioBroker
Installing ioBroker requires only a single command.
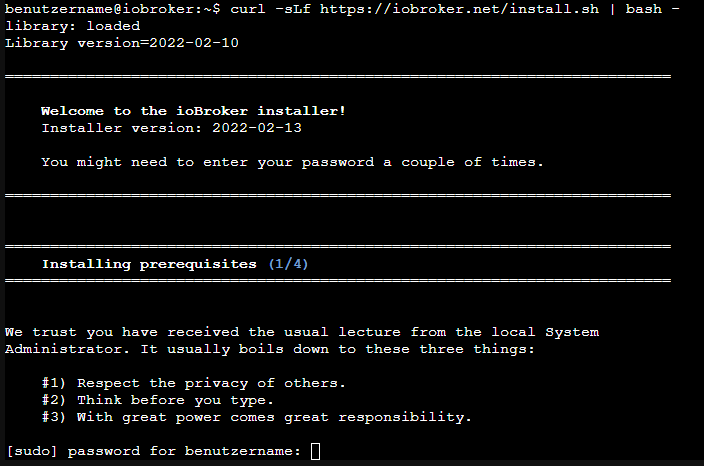
curl -sLf https://iobroker.net/install.sh | bash -
The installation process is divided into 4 steps, which are completed fully automatically.
- Installing prerequisites (1/4)
- Creating ioBroker user and directory (2/4)
- Installing ioBroker (3/4)
- Finalizing installation (4/4)
Installer
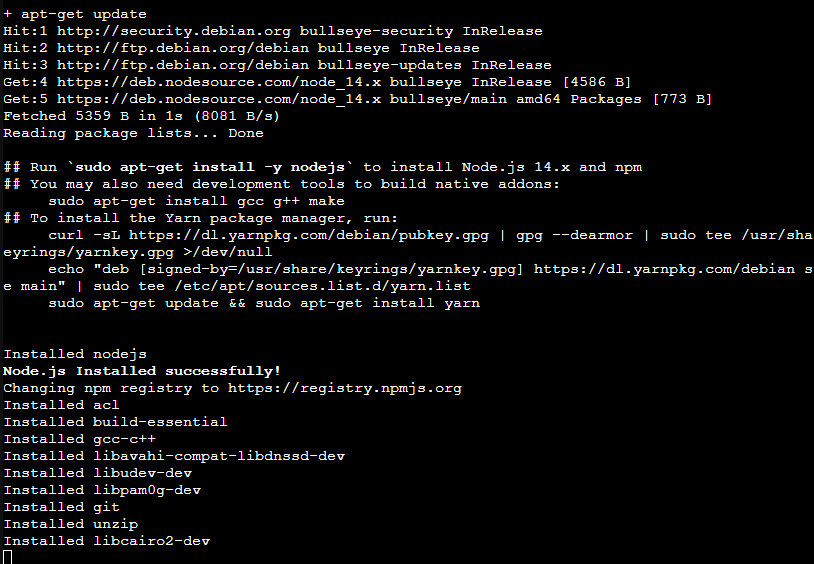
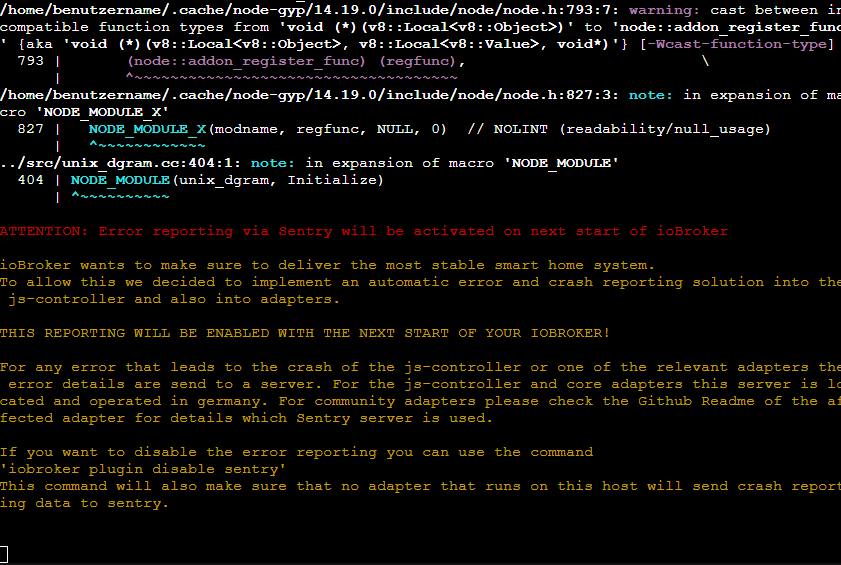
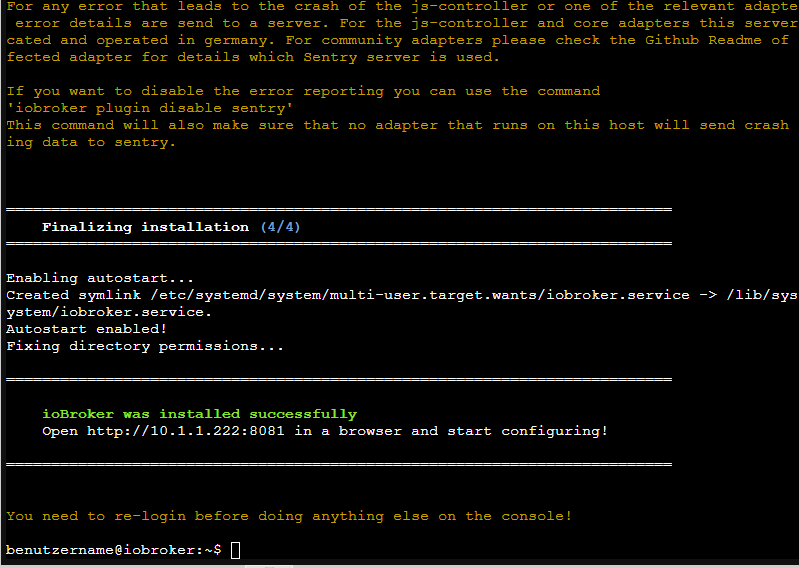
The installation is successfully completed when the following appears at the end.
ioBroker was installed successfully
Open http://10.1.1.222:8081 in a browser and start configuring!
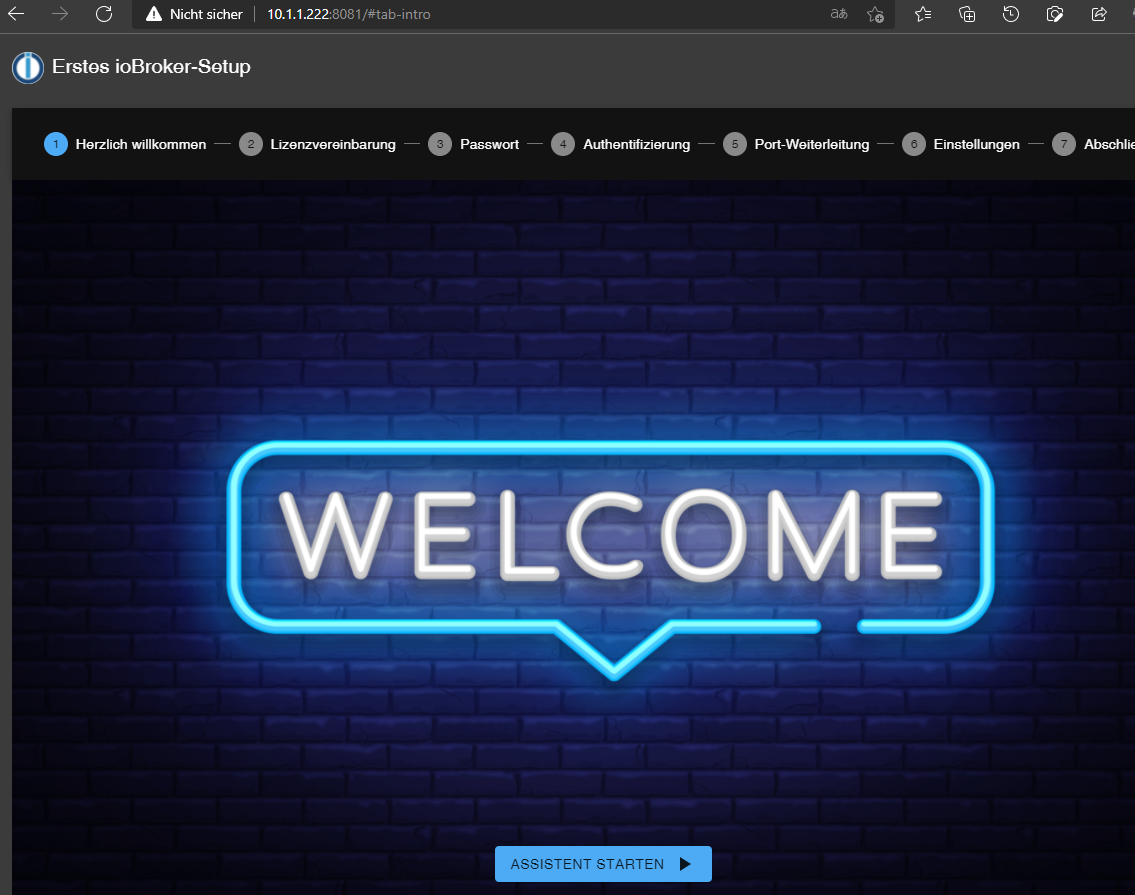
This also means that ioBroker can now be accessed via the address in your browser. If everything worked correctly, you will be greeted by the ioBroker setup. Now it's just a few more steps, which the wizard will guide you through.
Bilderserie ioBroker Assistent
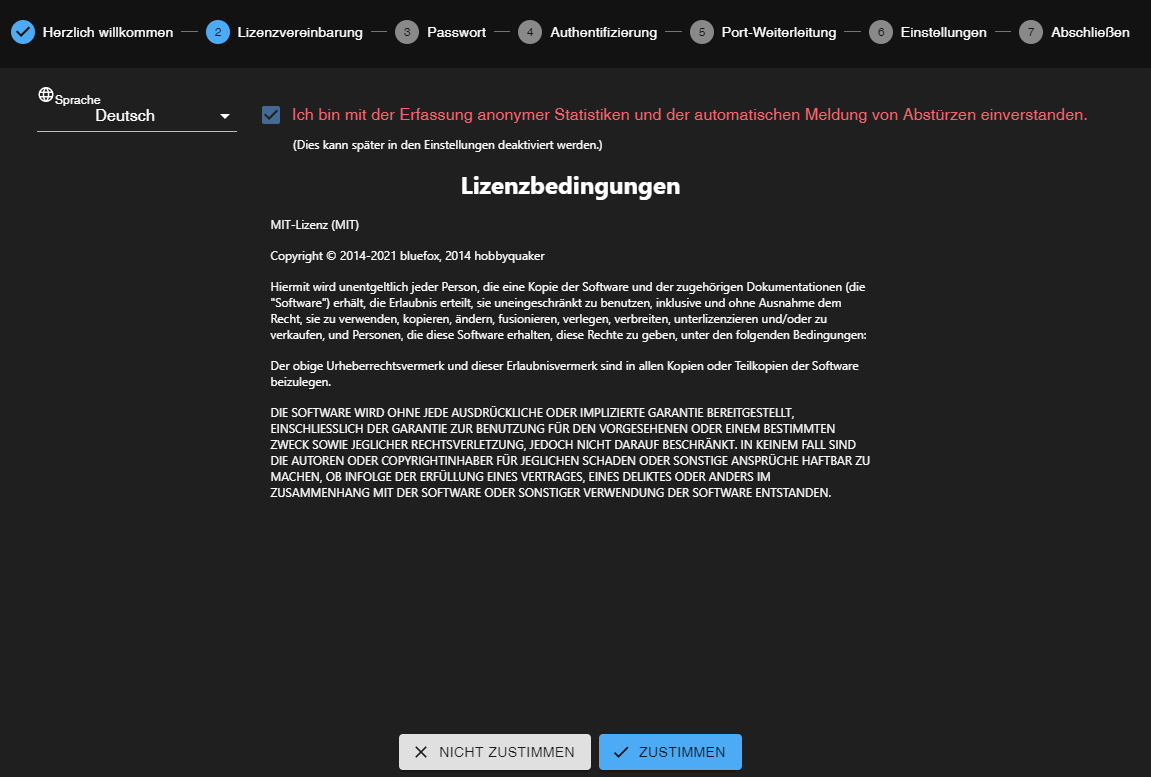
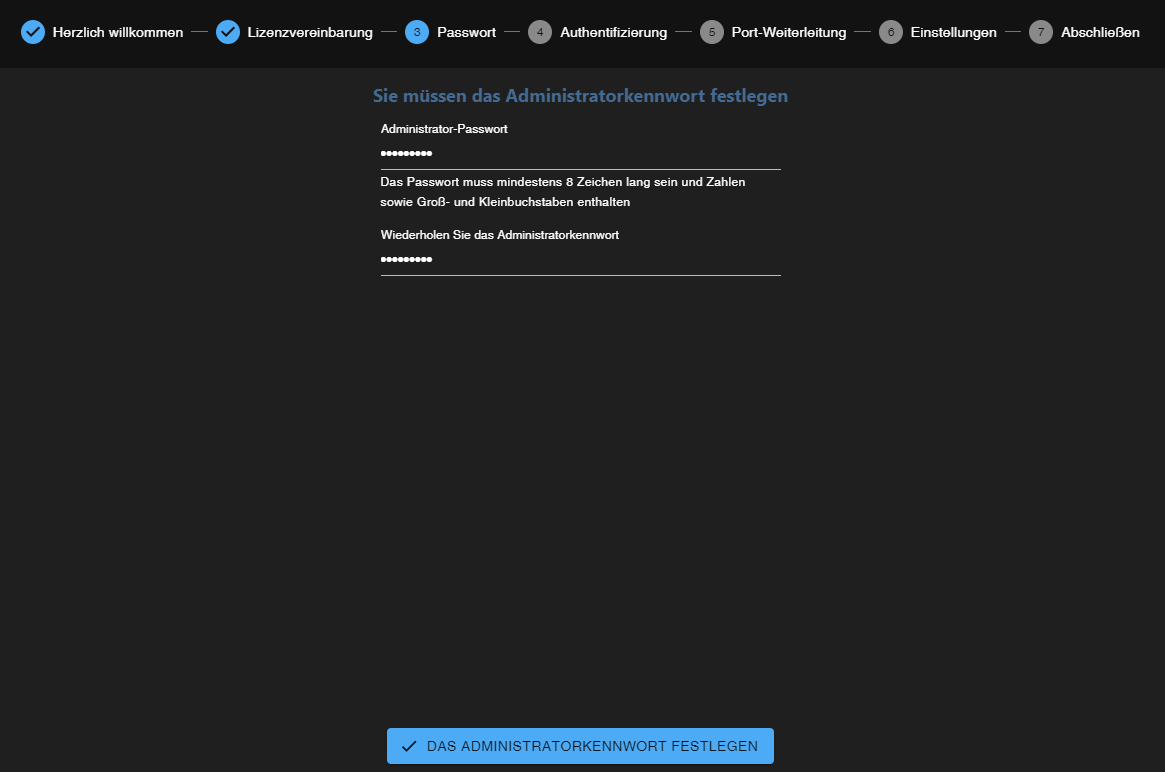
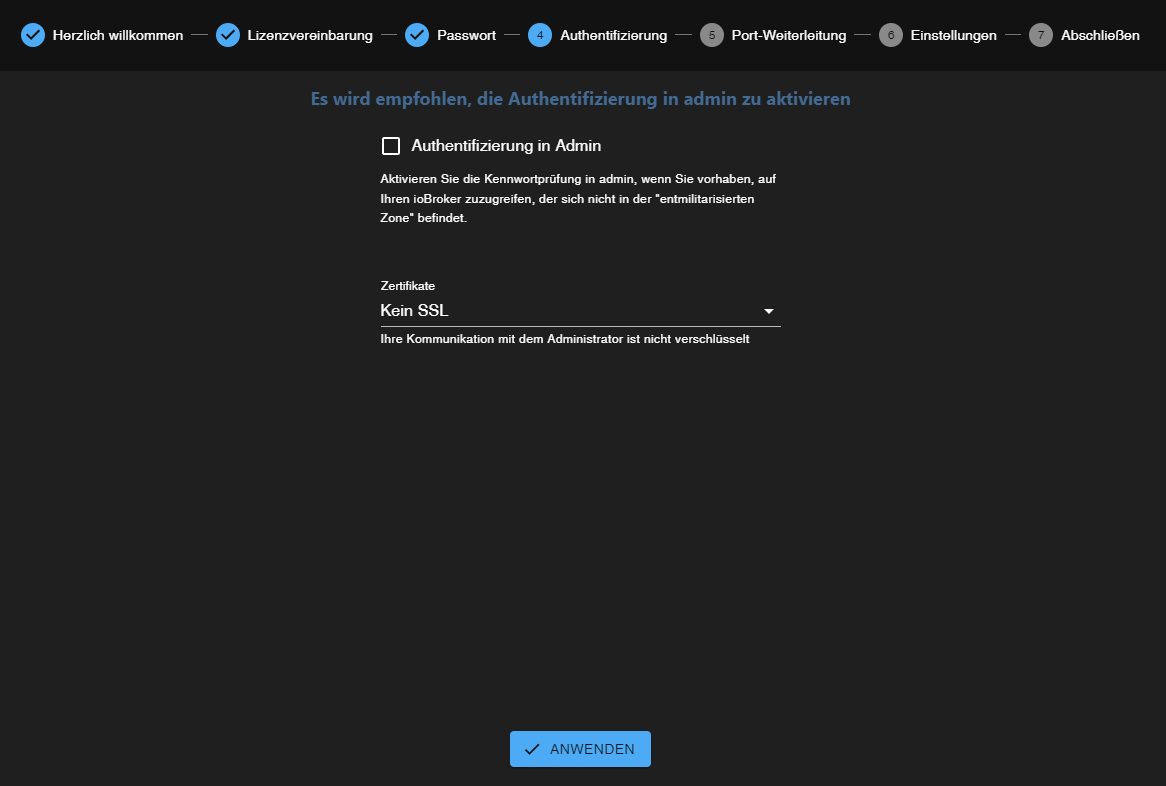
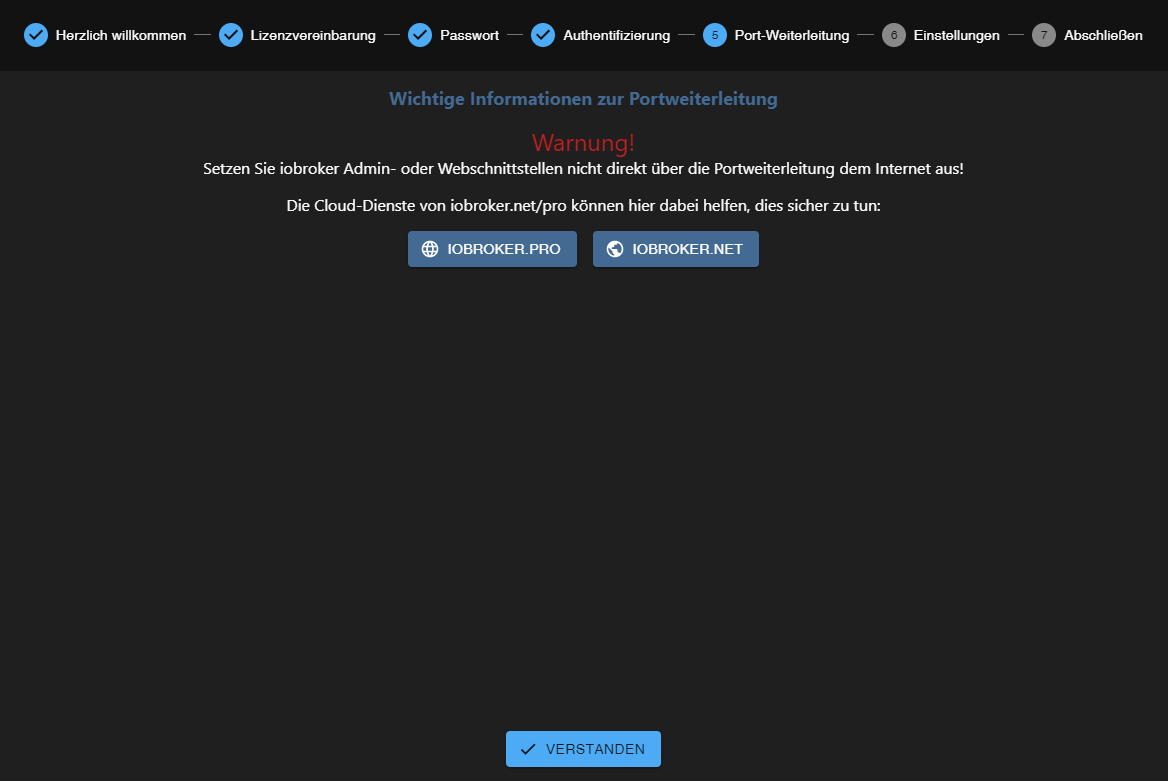
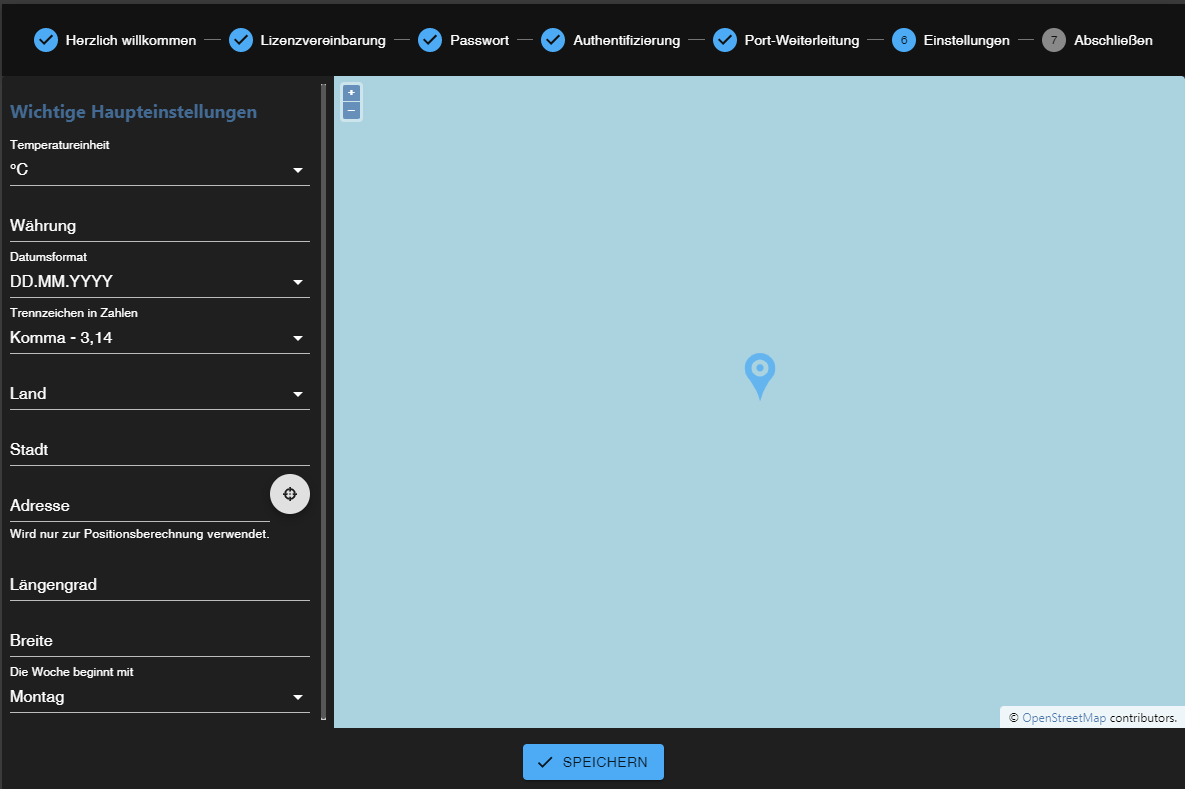

Afterwards, you have the option to search for devices and services. Required adapters/instances can then be created automatically.
Bilderserie Geräte/Dienst Suche
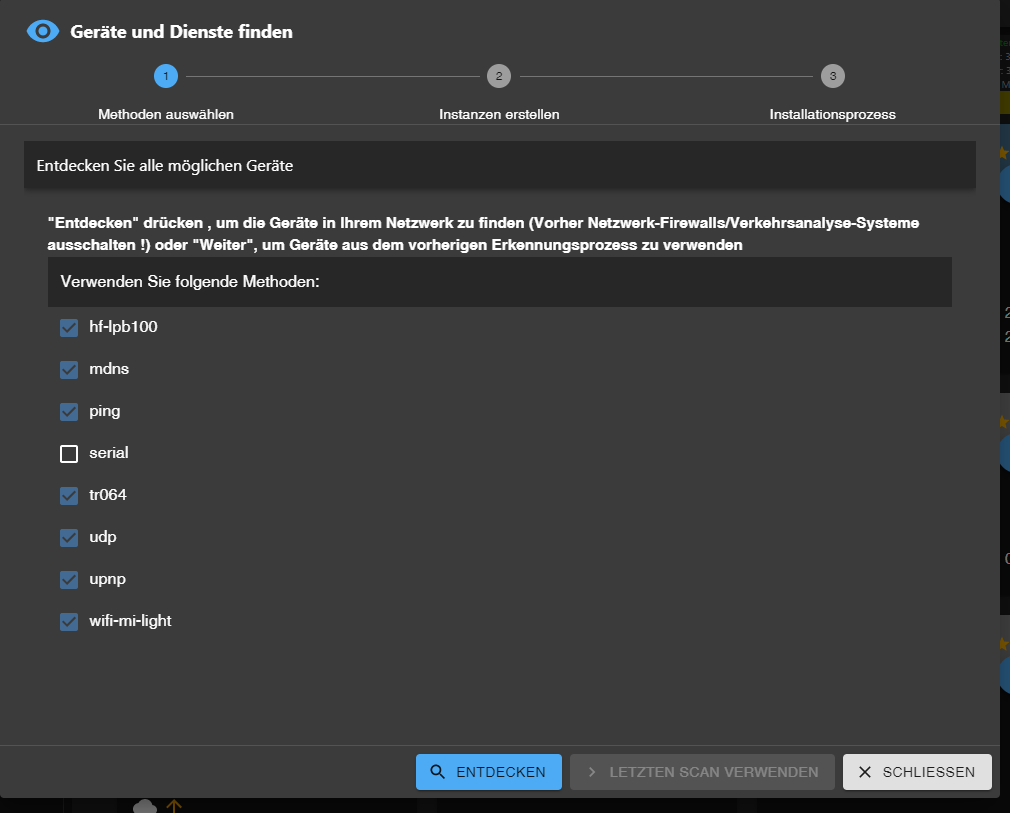
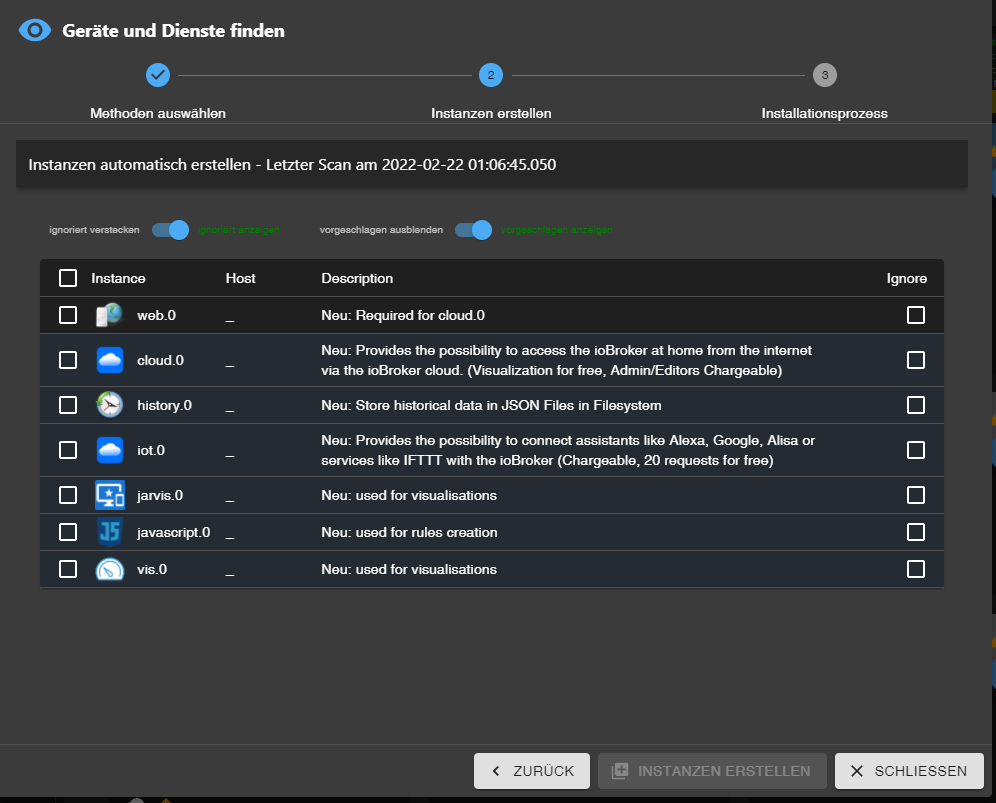
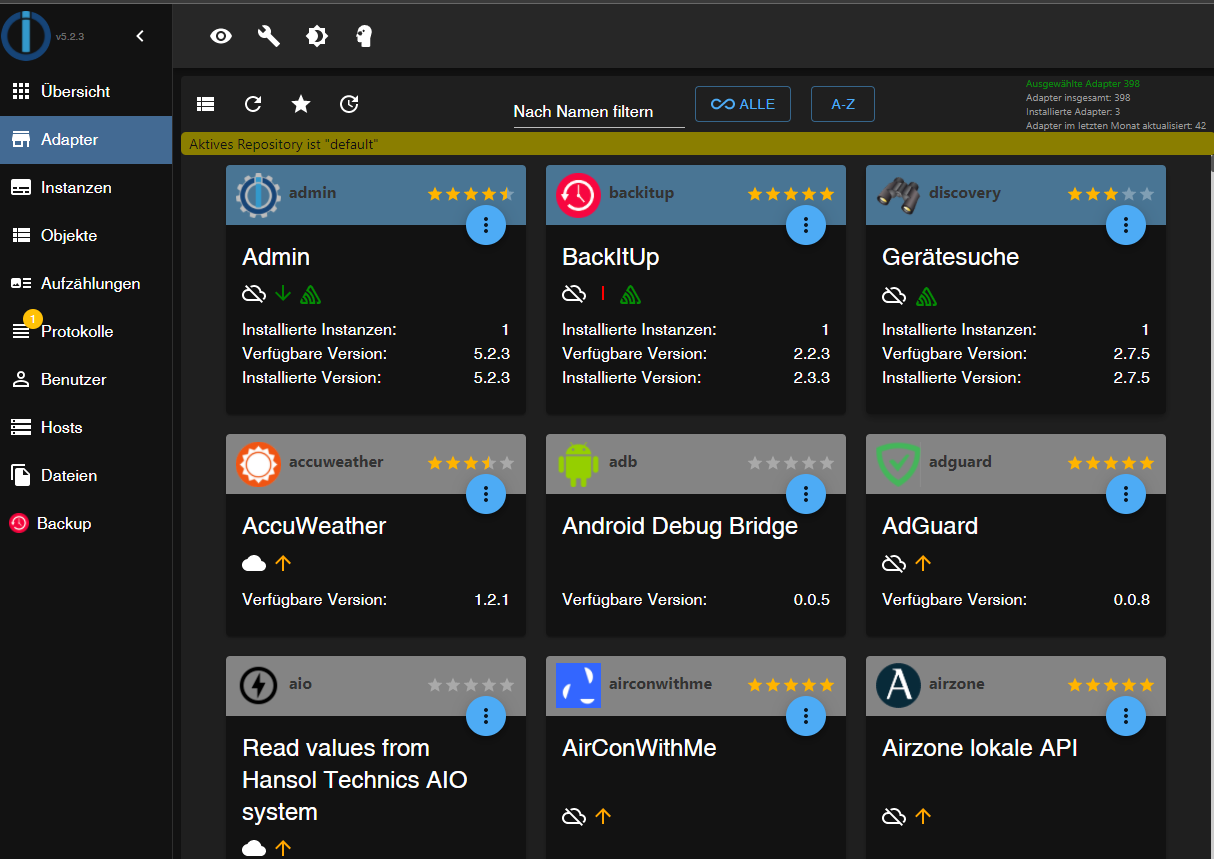
The ioBroker installation is now complete. Additional adapters can be installed at any time, depending on the use case and your preferences.
Proxmox - LXC (Linux Containers) -> Passing through USB devices
This part of the guide explains step by step how to pass through a USB device (USB passthrough) in Proxmox to an LXC (Linux container).
With a virtual machine (VM), passing through a USB device is possible directly via the Proxmox web interface. With a Linux container, this currently requires manually editing the LXC configuration file.
The instructions describe, as an example, how to integrate a Texas Instruments Inc. CC2531 Zigbee stick.
Note: The CC2531 is now technically obsolete, has very little memory, and is no longer recommended for new setups in the ioBroker community. Modern dongles (e.g., the Sonoff Zigbee 3.0 USB Dongle Plus based on the CC2652P or a ConBee 3 ) should be used instead. However, the passthrough steps shown in this guide are identical for almost all USB serial devices (e.g., smart meter readers, other Zigbee dongles). USB network devices (such as Bluetooth or Wi-Fi) are the exception.
- This part of the instructions uses Proxmox version 9.x.
1.) Gather information about the USB device
Establishing an SSH connection to Proxmox:
ssh root@IP-Adresse
If the USB device is already connected to the Proxmox host, unplug the device for now.
The following command lists all currently connected USB devices on the Proxmox host:
lsusb

Now, the USB device to be integrated is plugged into the Proxmox host and the lsusb command is executed again.
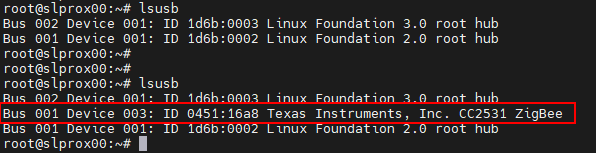
The screenshot shows that a new device is listed with the USB bus number: 001 and the device number: 003 .
This information is needed to output the major device number from the device using the following command:
ls -l /dev/bus/usb/001/003
Important: Use your USB bus number and device number as the output of the command!
ls -l /dev/bus/usb/USB-Bus-Number/Device-Number

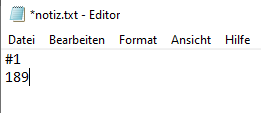
In this example, the USB device has the major device number 189. Note the value of your device in a text file with the notation: #1
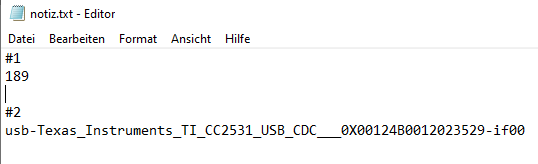
Next, the unique ID of the USB device is output and the value is noted in the text file with the notation: #2:
ls /dev/serial/by-id/

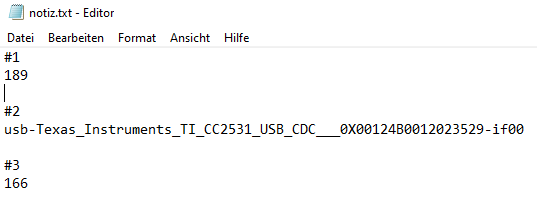
As a final step, the major device number of the ttyACM is output and noted with the notation: #3:
ls -l /dev/ttyACM*

If no output is produced, check with "ls -l /dev/serial/by-id/" whether the USB device is mounted by the system as ttyUSB. If so, replace all subsequent commands that refer to ttyACM… with ttyUSB… If no output appears, it is not a USB CDC class device (serial communication), and all steps regarding mounting from ttyACM can be ignored.
Thus, the three values of the USB device are available, which are needed for integrating it into the LXC configuration file.
2.) Edit the LXC configuration file
On the Proxmox host, switch to the LXC configuration directory using:
cd /etc/pve/lxc
The configuration file has the same ID number that was assigned when the LXC file was created!
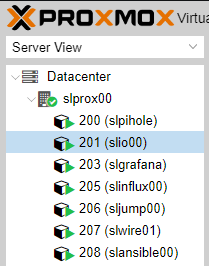

Before editing the configuration file, a backup should be created:
cp 201.conf 201.conf.backup

Now the configuration file is edited using vi or nano:
nano 201.conf
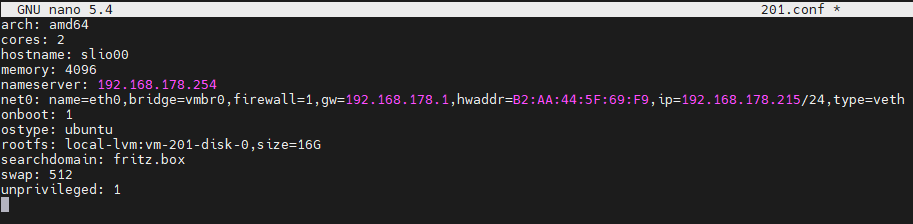
The following is added to the end of the configuration file:
lxc.cgroup2.devices.allow: c 189:* rwm
lxc.mount.entry: usb-Texas_Instruments_TI_CC2531_USB_CDC___0X00124B0012023529-if00 dev/serial/by-id/usb-Texas_Instruments_TI_CC2531_USB_CDC___0X00124B0012023529-if00 none bind,optional,create=file

lxc.cgroup2.devices.allow: c 166:* rwm
lxc.mount.entry: /dev/ttyACM0 dev/ttyACM0 none bind,optional,create=file
Replace the highlighted values with the entries from your notes!
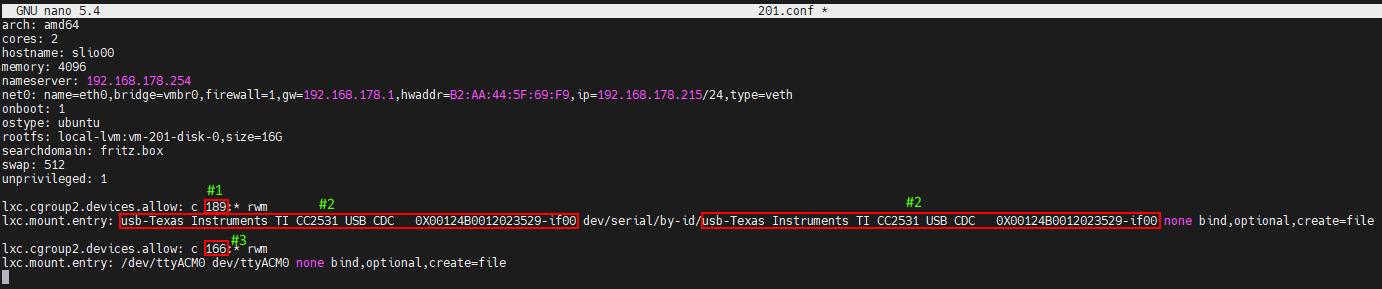
- The first line refers to the major device number 189. Note: #1
- In the second line, the unique id (usb-Texas_Instruments_TI_CC2531_USB_CDC___0X00124B0012023529-if00) from note: #2 is specified individually and with the absolute path (without line break).
- The third line specifies the major device number 166 from ttyACM, note #3.
Save the configuration file (In the Nano editor, use the keyboard shortcut: CTRL + o & CTRL + x to exit the editor)
ATTENTION! - If your container has active snapshots:
Then the lxc.cgroup code should not be placed at the end of the config file, but before the first entry of a snapshot.
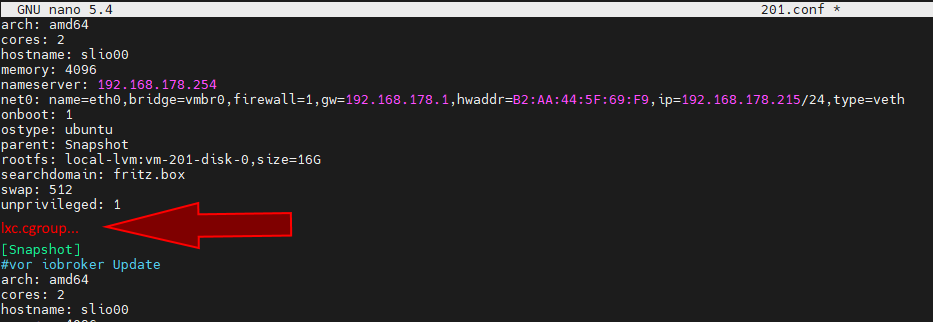
ATTENTION! - Proxmox installation prior to version 7.0:
Replace the entries with
lxc.cgroup2
through
lxc.cgroup
Abschließend wird der folgende Befehl ausgeführt, um die benötigten Rechte für `ttyACM0` zu setzen:
chmod o+rw /dev/ttyACM*
To apply the changes to the LXC, a cold boot of the container is performed using pct stop id / pct start id :
pct stop 201
pct start 201
Tip: It's best to save a copy of your working config file externally, as the integrated Proxmox backup service, for example, does not back up the contents of your config!
3.) Check LXC USB passthrough & Zigbee instance configuration
Establishing an SSH connection to the LXC:
ssh Benutzer@IP-Adresse
With the commands:
lsusb
&
ls -l /dev
The system checks whether the changes to the configuration file were successful.
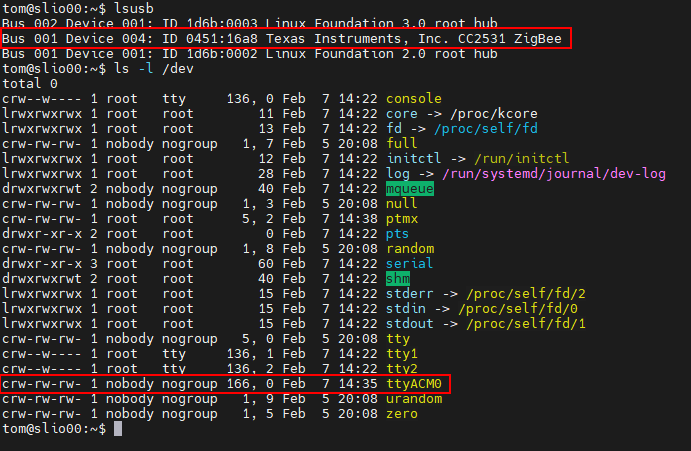
-
As can be seen in the screenshot, the container now has access to the USB device.
-
The important thing here is that ttyACM0 has the same permissions as in the screenshot, i.e. , crw-rw-rw- 1 nobody nogroup
If you do not check whether all values in the configuration file are set as described, and the permissions still do not match, skip to point 5.
-
The screenshot also shows that the device number of the CC2531 has changed from 3 to 4. This is because the stick was unplugged and plugged back in. However, since the configuration file specifies the unique ID and not the bus/device number, USB passthrough continues to work.
If a Zigbee stick is passed through to the container as described at the beginning, the COM port name can be found in the ioBroker settings of the Zigbee adapter.
/dev/ttyACM0
to enter so that the device is addressed correctly.

4.) UDEV rule for permanent rights: Adaptation of ttyACM0
At the end of step 3, the command was used
chmod o+rw /dev/ttyACM*
The appropriate permissions for ttyACM0 have been set, but these permission changes will be reset when the Proxmox host is restarted; a udev rule is required on the Proxmox host for a permanent adjustment.
Using lsusb we list the currently connected USB devices again:
lsusb

This time we note down the numerical values according to ID, in this case 0451:16a8
- The first value: 0451 represents the idVendor and the second value: 16a8 represents the idProduct .
Now, the udev rule is created under /etc/udev/rules.d using vi or nano:
nano /etc/udev/rules.d/50-myusb.rules
and the following content was inserted:
SUBSYSTEMS=="usb", ATTRS{idVendor}=="0451", ATTRS{idProduct}=="16a8", GROUP="users", MODE="0666"

Finally, execute the following command to activate the udev rule:
udevadm control --reload
5.) Troubleshooting
Error: ttyACM0 permissions in lxc are incorrect or are lost after a short time (ConBee II).
ls -l /dev/ttyACM0
 c--------- 0 nobody nogroup 166, 0 Feb  7 14:29 ttyACM0
Solution: Create a persistent binding for the container using mknod.
To do this, the folder "devices " is created in the path "/var/lib/lxc/CONTAINERID" and the binding is created in this folder using mknod:
mkdir /var/lib/lxc/201/devices
cd /var/lib/lxc/201/devices
mknod -m 666 ttyACM0 c 166 0
- mknod creates a file named ttyACM0 in that path (as long as the file exists, the device is bound to the lxc)

Major device number and ttyACM... adjust if necessary.
Next, the entry in the lxc configuration file must be adjusted:
lxc.mount.entry: /dev/ttyACM0 dev/ttyACM0 none bind,optional,create=file
will be replaced by:
lxc.mount.entry: /var/lib/lxc/CONTAINERID/devices/ttyACM0 dev/ttyACM0 none bind,optional,create=file
Setting up a USB stick/hard drive for backups
To allow future backups to be stored separately, there is the option of integrating a USB device in the form of a stick or a hard drive on the Proxmox host.
Note: Earlier versions of this guide often recommended the vFAT (FAT32) file system because it can be read without problems under both Linux and Windows. This is now strongly discouraged! FAT32 has a technical limit of a maximum of 4 GB per file . Since modern Proxmox backups (e.g.,.vma.zst If the files of entire VMs or containers often far exceed this size, the backup process on FAT32 will abort with errors such as "File too large".
Common, suitableFilesysteme are therefore:
- EXT4 (standard for pure Linux, highly recommended for Proxmox backups)
- NTFS or exFAT (if the backup drive absolutely must also be read natively under Windows)
If the storage medium is still unpartitioned or you want to reformat it, you can do this on a Windows PC or directly on the Proxmox server.
Once the storage medium is prepared, it can then be mounted into the system and subsequently added directly as storage (directory) via the Proxmox GUI.
WARNING! - Reformatting will erase all existing data on the storage medium.
The following example instructions refer to setting up EXT4 directly on the Proxmox host.
Note: The following commands setroot Prerequisite. If a separate user is used on the host, the commands must be executed withsudo be carried out.
Prepare device
1 - Identify device
First, you make the device usinglsblk to locate the device. It is advisable to execute the command once before and once after plugging it in. This makes it easier to identify the device.
lsblk
It then looks something like this (letters vary depending on how many devices are connected):
sdd                    8:48   0 119.2G  0 disk
├─sdd1                 8:49   0 119.2G  0 part
└─sdd9                 8:57   0     8M  0 part
sde                    8:64   0 931.5G  0 disk                    <-- Das ist die Disk /dev/sde
└─sde1                 8:65   0 931.5G  0 part                    <-- Das ist die erste Partition /dev/sde1
sr0                   11:0    1  1024M  0 rom
sr1                   11:1    1  1024M  0 rom
2 - Partitioning
With the menu-drivencfdisk The drive will be partitioned:
cfdisk /dev/sde
3 - Create a file system
Now the previously created partition needs to be formatted. As mentioned above, we will use the EXT4 file system for this. With the commandmkfs and the partition is formatted according to the appropriate parameters:
mkfs.ext4 /dev/sde1
4 - Mount the drive
In order to use the completed data carrier, it mustgemountet become.
A suitable mount point is created for this purpose. To ensure the storage device is automatically remounted after a reboot, a corresponding entry is required in the.../etc/fstab necessary.
For this, the unique UUID of the drive must be read.
Create mount point:
mkdir /media/ext_usb
Mount the data carrier:
mount /dev/sde1 /media/ext_usb
Determine UUID:
blkid | grep -i sde
This results in, for example:
/dev/sde1: LABEL="Backup" UUID="136b058d-f0c8-406d-a82b-2adcc00b72bf" BLOCK_SIZE="4096" TYPE="ext4" PARTUUID="00011a10-01"
Entry in the/etc/fstab Edit with nano:
nano /etc/fstab
Now this entry will be added and then saved:
UUID="136b058d-f0c8-406d-a82b-2adcc00b72bf" /media/ext_usb ext4 defaults 0 2
(Note: For EXT4 partitions, the fstab file is usually written at the end of a line.)0 2 (Entered for the file system check.)
5 - Adding storage to Proxmox
Under Data Center > Storage, a directory can now be added. The ID name is freely selectable, e.g., usb-backup .
The path is specified in the Directory column; in this case/media/ext\_usb .
For content , you only need to select the desired function (e.g., VZDump backup file).